Set up for Unity
This page shows how to enable Spatial Reality Display in your Unity projects.
Prerequisites
Have completed the setup of the Spatial Reality Display (see Setup Spatial Reality Display Settings).
Import Spatial Reality Display Plugin for Unity
-
Download latest srdisplay-unity-plugin.unitypackage
-
Create a new Unity project
Create an appropriate 3D project from the Built-In Renderer Pipeline (BRP), Universal Render Pipeline (URP), or High Definition Render Pipeline (HDRP).

-
Import Spatial Reality Display Plugin for Unity
-
Select Assets > Import Package > Custom Package and select srdisplay-unity-plugin.unitypackage that you downloaded

-
Or you can drag & drop srdisplay-unity-plugin.unitypackage to Project in the UnityEditor, also.
-
-
Click Import in the Import Unity Package dialog
Make sure that all package options are checked
Caution
When you import srdisplay-unity-plugin.unitypackage to the project that is already imported the package, you may get the error with something like the following dialog.

In this situation, you must remove Assets / SRDisplayUnityPlugin with the explore application (not Unity Editor)
-
If the architecture of the Unity project is not Intel 64-bit, the plugin will change the architecture to Intel 64-bit automatically. When you find the following dialog, press OK to change the correct architecture.

Caution
Spatial Reality Display Plugin for Unity only supports Windows Intel 64-bit architecture
Configure the project settings
-
We recommend to set the VSync Count for all Quality Levels to Don't Sync (See: Minimize the latency for good user experience in Tips and Constraints).

-
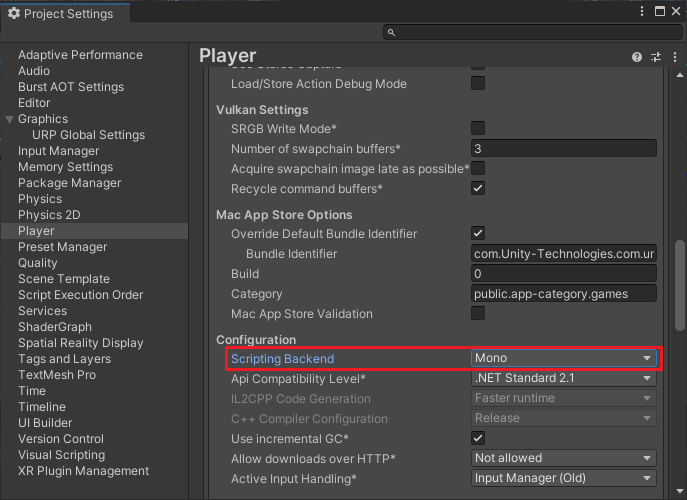
Only Mono is supported for Scripting Backend. Make sure that Project Settings > Player > Scripting Backend is set to Mono.
Configure the build settings
-
Set Target Architecture
Open Build Settings dialog from File > Build Settings
-
Make sure that Architecture is Intel 64-bit
