Quickstart
Let's get started with Spatial Reality Display app in Unity!
Prerequisites
-
Have completed the setup of the Spatial Reality Display (see Setup Spatial Reality Display Settings).
- Connect your Spatial Reality Display to PC.
- Configure the settings of your Spatial Reality Display.
- Install Spatial Reality Display Settings.
-
Installed UnityHub and UnityEditor (see: Download Unity).
- Currently supported Unity versions: Unity 2021.3, 2022.3 and Unity 6.
Note
Only one Spatial Reality Display app can be run at a time. Multiple apps will fail to launch.
Caution
Exit Unity Hub before installing Spatial Reality Display Settings.
Create a new Unity project with Spatial Reality Display Plugin for Unity
-
Download latest srdisplay-unity-plugin.unitypackage
-
Create a new Unity project
Here, create a 3D project for the Universal Render Pipeline (URP).

-
Import Spatial Reality Display Plugin for Unity
-
Select Assets > Import Package > Custom Package and select srdisplay-unity-plugin.unitypackage that you downloaded

Or you can drag & drop srdisplay-unity-plugin.unitypackage to Project in the UnityEditor, also.
-
Click Import in the Import Unity Package dialog
Make sure that all package options are checked
-
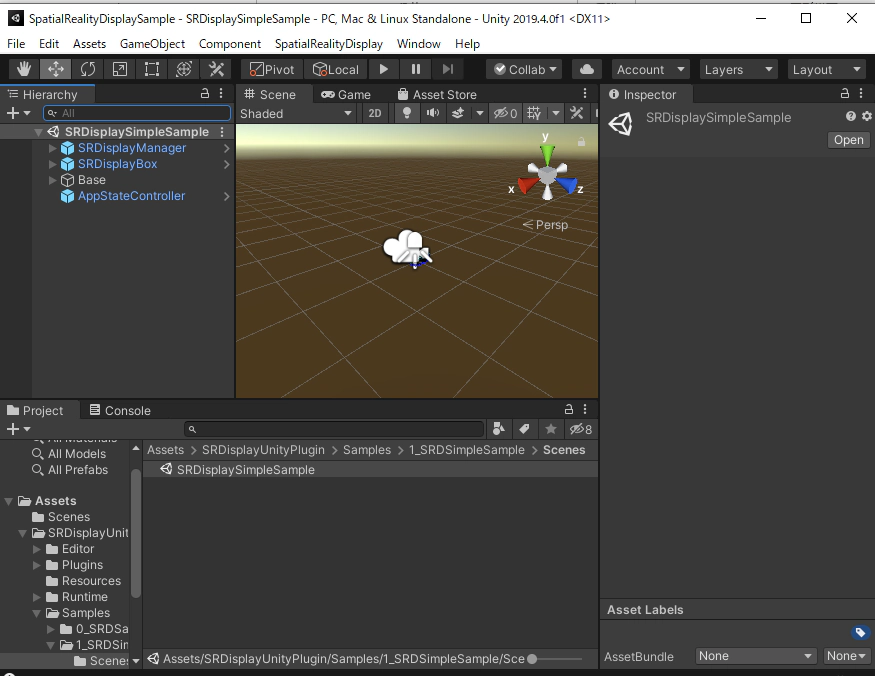
Open the sample scene
-
Open SRDisplaySimpleSample scene in Assets / SRDisplayUnityPlugin / Samples / 1_SRDSimpleSample / Scenes
-
If the architecture of the Unity project is not Intel 64-bit, the plugin will change the architecture to Intel 64-bit automatically. When the following dialog window appears, click OK to switch to the correct architecture.

Caution
Spatial Reality Display Plugin for Unity only supports Windows Intel 64-bit architecture
Caution
Only "Mono" is supported for "Scripting Backend" in the Project Settings. Make sure that "Project Settings"-> "Player"-> "Scripting Backend" is set to "Mono".
Caution
Input Manager is used for key input. Set "Active Input Handling" to "Input Manager (Old)" or "Both" in "Project Settings" -> "Player" -> "Other Settings".
Tips
Recommend to do Generate Lighting of the SRDisplaySimpleSample from Window > Rendering > Lighting Settings
Build and run the Spatial Reality Display app
-
Configure Project Settings from Edit > Project Settings...
-
Set the VSync Count for all Quality Levels to Don't Sync (See: Minimize the latency for good user experience in Tips and Constraints

-
-
Open Build Settings dialog from File > Build Settings
-
Configure settings
- Click Add Open Scene and make sure that SRDisplaySimpleSample is added in Scenes In Build
-
Make sure that Architecture is Intel 64-bit
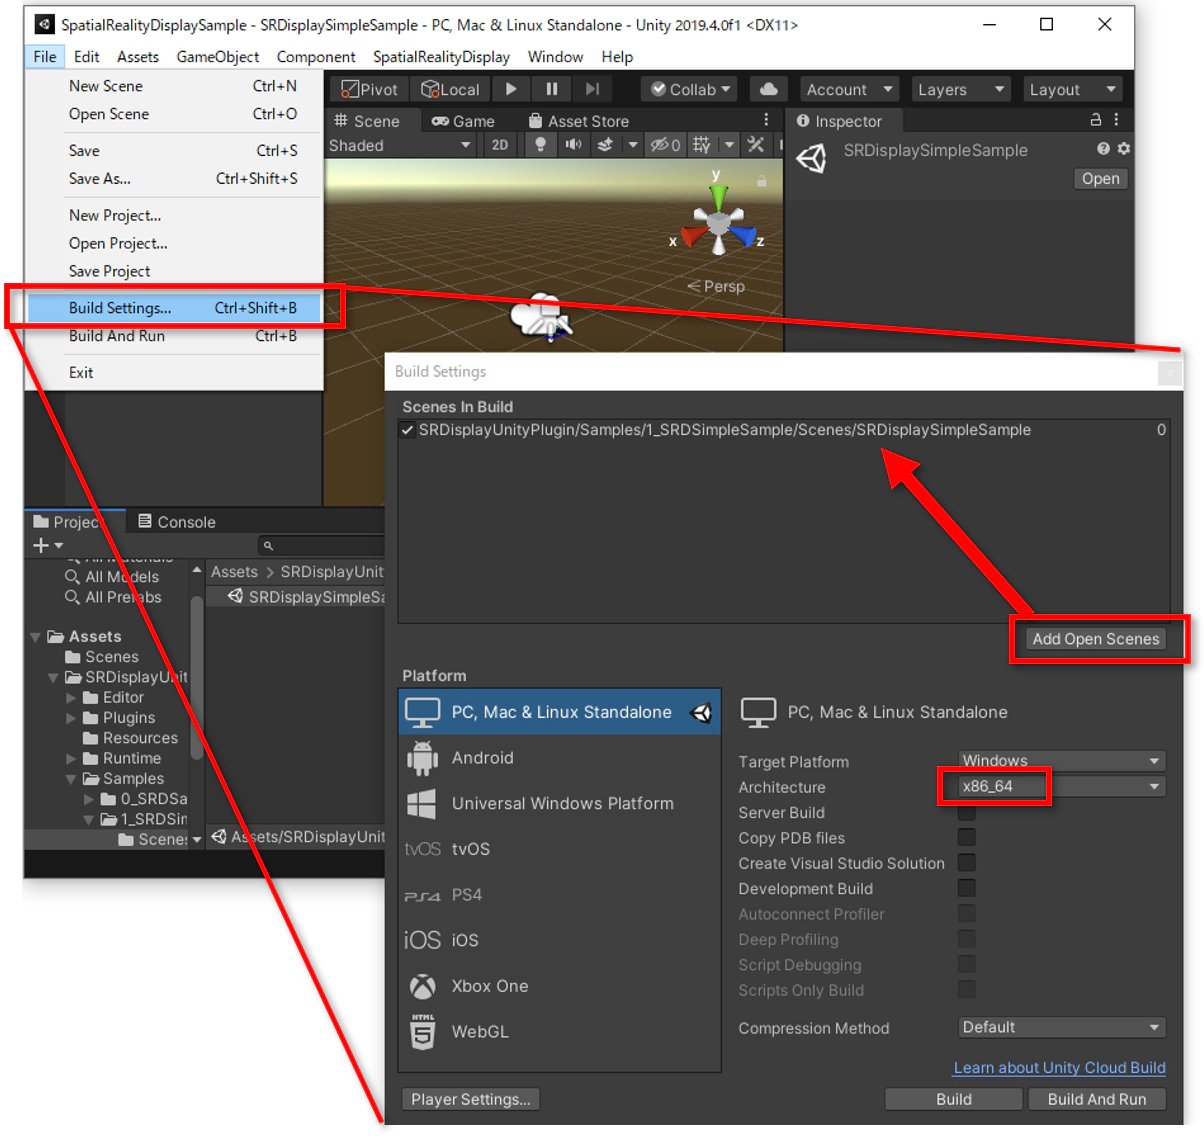
-
Click Build and choose the folder where you want to save the app.

Unity will create an executable file in that folder. Click on that file and it will launch the content on the Spatial Reality Display.