Spatial Reality Display Settings
The Spatial Reality Display Settings app can adjust the Spatial Reality Display settings and check if the high-speed vision sensor can recognize a user's face.
Launch Spatial Reality Display Settings
- Press the Windows Start button.
- Select Spatial Reality Display > Spatial Reality Display Settings and launch it.
- After launching, the following two windows will appear.
Sensor Setting
Spatial Reality Display Settings(SR1)

Spatial Reality Display Settings(SR2)

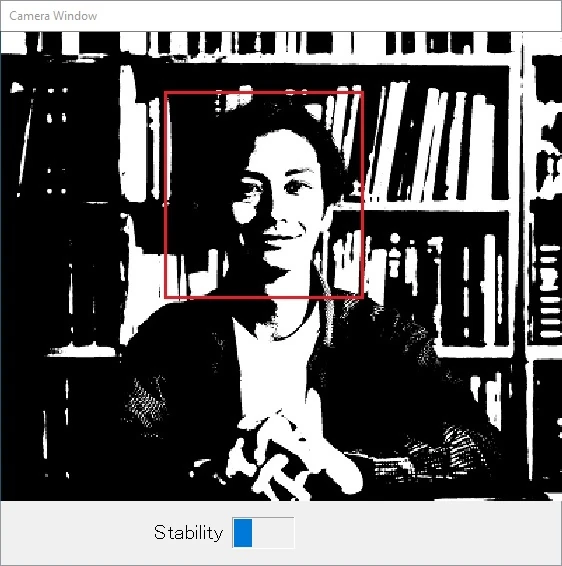
Image taken with high-speed vision sensor (camera window view)
Sensor Gain (SR1/SR2)
If the room is too bright or too dark, the camera may not be able to recognize faces correctly and Spatial Reality Display may not display stereoscopic images correctly. Follow the steps below to adjust the camera gain so it can recognize faces correctly.
-
Review the camera capture image window.
If the captured image is bright, the camera gain may be too high.
If the captured image is dark, the camera gain may be too low.
-
Move the Sensor Gain Settings slider bar in the Spatial Reality Display Settings window.
To lower the gain, move the slider to the left.
To increase the gain, move the slider to the right.
-
For example, point your face to the Spatial Reality Display so that it appears in the camera capture image window.
If the camera gain is appropriate, a red rectangle appears around the face in the capture image window.
If the red rectangle does not appear even after adjusting the gain, consider adjusting the ambient light.
-
Adjust the gain so that the outline of the face, eyes, nose, mouth, and eyebrows are clearly visible.
If the ceiling or rear lights cast shadows on the face, dim the lights or increase the gain.
Stability(SR1/SR2)
If you insert checkmark in the camera window, the image captured in a separate window will be displayed. The recognition rate is displayed in three levels.
Environment Settings (SR2)
Optimizes the face recognition start range and tracking range according to the scene being used.
Note
*If you want to use face detection and tracking in the full range, select "Viewer switching mode".
*The "Viewer switching mode" works the same as in version 2.0.1.
Creation Mode
This mode is ideal for solo viewing, such as when creating content in a studio or office. This mode is also ideal for viewing content that supports a wide range of tracking capabilities.
Exhibition Mode
This function prevents facial recognition of people other than the viewer in the exhibition hall where many people visit. By setting the face recognition range narrower, people who are not in front of the Spatial Reality Display are untracked and new people who are in front of it can be recognized. By ensuring that face recognition and tracking are performed on the viewer, viewing of stereoscopic images can be performed smoothly without stress.
Viewer switching mode
The two people in front of Spatial Reality Display can switch between viewers while sharing a screen. You can alternate between viewing the best 3D spatial images for each person without having to shift seats.
| Mode | Expected Scene | Expected Environment | Main Audience | Face Detection | Face Recognition Range | Tracking Range |
|---|---|---|---|---|---|---|
| Creation Mode | Studio/Office | Other people around or nearby | Only people in front of the display | Center priority | Narrow | Wide |
| Exhibition Mode | Exhibition | Multiple people in front of the display | Only people in front of the display | Center priority | Narrow | Narrow |
| Viewer switching mode | Presentation and Briefing Design Review Automobile Dealer |
Two people in front of the display | Two close to the center at the front of the display | Two people close to the center priority | Wide | Wide |
Crosstalk Correction (SR1)
You can switch the crosstalk correction by using Spatial Reality Display Settings.For more information, refer to "Crosstalk Correction for ELF-SR1".
-
Application controlled:
Crosstalk correction follows the application settings. Refer to Unity / UE for application settings.
-
Customize:
Crosstalk correction is the method specified in the drop-down box regardless of the application settings. In the drop-down box, you can select one of the following:
- Low
- Middle
- High
For more information about each crosstalk correction method, refer to this page.
-
Off:
Crosstalk correction is turned off regardless of the application settings.
Crosstalk Adjustment (SR2)
You can adjust and reduce crosstalk using Spatial Reality Display Settings. Corrects crosstalk in objects represented by midtone pixel values. In some cases, crosstalk can be further reduced by optimizing the settings according to the viewer.
For more information, refer to "About Crosstalk".
-
On:
Turns on crosstalk adjustment. If you still feel crosstalk after turning it on, adjust the slider bar. The optimal setting varies from person to person.
-
Off:
Turns off crosstalk adjustment.
Picture Quality Settings (SR2)
PQ Setting Tab
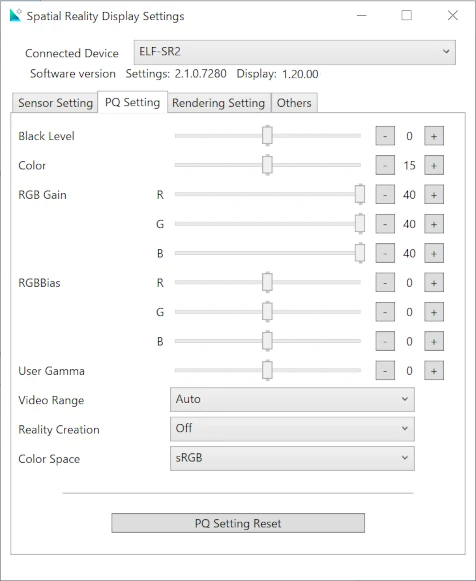
You can adjust the following picture quality settings from the Settings app.
- Black Level
- Color
- RGB Gain
- RGB Bias
- User Gamma
- Video Range
- Reality Creation
- Color Space
PQ Setting Reset
- Resets picture quality settings to the factory default settings.
Video Range(SR2)
Selects the PC output signal level from Auto, Full, or Limit. The initial value is Auto. Since there may not be a flag for automatic recognition, manual settings may be effective if you see black floating or black crushing.
Reality Creation(SR2)
You can select from Off, Low, or High for the super-resolution setting. The initial value is Low.
- Low: This mode is faithful to the source and provides the same level of detail as 2D rendering.
- High: This mode enhances the expressive power of content by enhancing the detail.
For content production, we recommend Low, even if it appears on a display other than Spatial Reality Display. For viewing, we recommend Low/High. However, jaggies may be noticeable when the Graphics processing setting on the Render Setup tab is in the Performance Priority mode. Therefore, adjust the value of this item to Low or Off depending on the contents, game engine settings, etc.
Rendering Setting (SR2)
Rendering Setting Tab
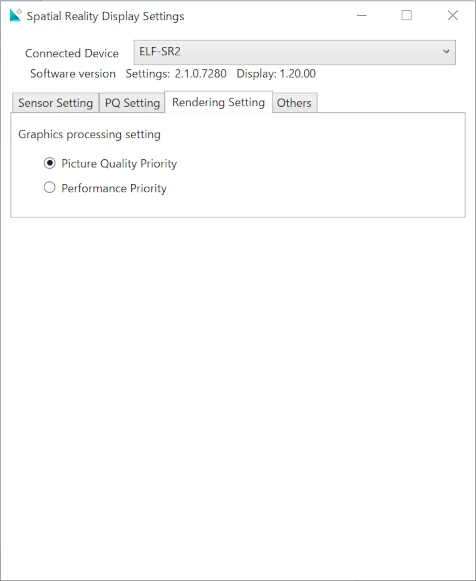
Graphics Processing Setting (SR2)
Picture Quality Priority/Performance Priority can be selected. Picture Quality Priority is ideal for viewing 3D images with higher quality and detail. Performance Priority is ideal for moving content to reduce the load during rendering. You can enjoy optimal image quality according to the content and purpose.
*Only applications developed with UE/Unity Plugin version SDK 2.1.0 or later are valid.
-
Picture Quality Priority
This mode prioritizes picture quality. Ideal for viewing 3D images with higher picture quality and detail. Ideal for low-motion content or content that requires a delicate or structured presentation.
-
Performance Priority
Reduces rendering resolution to reduce load. If you want to improve FPS for moving or heavy content, or if you want to run an app with a lower GPU grade, set this as necessary.
* The dot size may appear large in the point cloud data (Point Cloud) or in the point representation by the effect.
* The appearance of the jaggies may be affected.
Display setting(SR2)
Display setting Tab
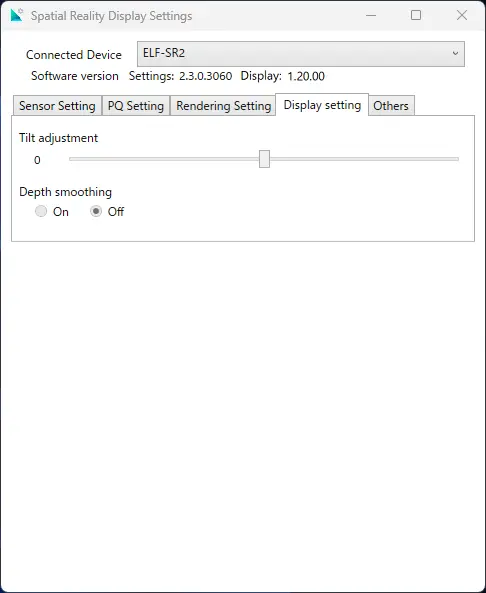
Tilt adjustment(SR2)
You can adjust the tilt of the displayed image based on the installation situation of the SR2. For example, when running an application compatible with Wall mount mode, if the ELF-SR2 cannot be oriented at 90 degrees due to location constraints and remains at 80 degrees, you can adjust the displayed image by setting it to -10. You can adjust within the range of -45 degrees to 45 degrees.
Note
Wall mount mode
With ELF-SR2, you can use a VESA mount to vertically install it using a monitor arm or similar item just in the same way as regular monitors. However, existing applications may appear tilted. Starting from SDK2.3.0, applications can be developed with the assumption that ELF-SR2 is vertically installed. This mode is called Wall mount mode.
Depth smoothing(SR2)
In Wall mount mode, changes in the image may not be smooth in response to facial movements. In such cases, enabling this setting will make the image transitions smoother.
Note
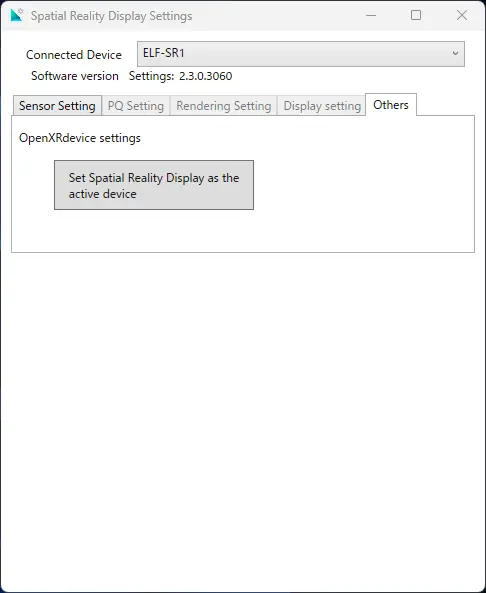
Others
Others Tab(SR1)
Others Tab(SR2)

Start up Logo (SR2)
You can show or hide the Sony logo displayed at startup.
- On: Displays the Sony logo at startup.
- Off: Does not display the Sony logo at startup.
Fn key setting (SR2)
You can configure the functions that operate with the Fn key for this instrument.
-
2D ↔ 3D switching
Switches the display mode between 2D and 3D. -
Viewer switching
Two faces close to the center in front of Spatial Reality Display can be detected and switched alternately. The best stereoscopic image for each can be switched alternately while viewing.
OpenXRdevice settings
- Set the Active Runtime configured for other OpenXR-compatible VR devices to Spatial Reality Display and allow OpenXR-compatible applications to run on the Spatial Reality Display.
Factory Reset(SR2)
- Resets all settings to factory defaults.