Moving an Actor Using the Unreal Engine Plugin
In the next step, let's install the Unreal Engine Plugin in Unreal Engine to try and make an actor move.
Reference
Advance Preparations
Prepare to use the Unreal Engine Plugin using the following procedure.
- Connect the PC (Windows/Mac) on which Unreal Engine is installed to the local network.
- Access the Downloads page and download the latest version of the Unreal Engine Plugin.
- Extract the downloaded ZIP file to any folder.
For details about the distributed data, refer to Content of the distributed data. - Connect the smartphone on which the mocopi app is installed to the local network.
- Refer to Sending Data from a mocopi App for the state in which motion data can be sent using UDP from a mocopi app.
Specify the IP address of the PC on which Unreal Engine is installed in the "IP" field, the port number (initial value: 12351) to use in the "Port" field, and "mocopi (UDP)" for the send format.
The advance preparations are now complete.
STEP 1: Install the Unreal Engine Plugin
- Start Unreal Engine.
When using an existing Unreal Engine project, proceed to Step 3. - Create a new Unreal Engine project, and close it.
-
Copy the Unreal Engine Plugin (MocopiLiveLink folder) extracted in Step 3 of the Advance Preparations to your project's "Plugins" folder.
If you don't have one, create a "Plugins" folder in the root folder of your project.Reference
- Remember to get the plugin version that matches the version of the project you will be working on (UE 5.0 or UE 5.1 or UE 5.2 or UE 5.3).
-
If you want to load the plugin to any project, copy the Unreal Engine Plugin (MocopiLiveLink folder) to Unreal Engine's Plugins/Marketplace folder. If this folder doesn't exist, create it. NOTE: This installation is preferred for packaging the plugin into a Game.
Unreal Engine's Plugins/Marketplace folder path:
Ex [UE 5.1 on Windows] C:\Program Files\Epic Games\UE_5.1\Engine\Plugins\Marketplace\
Ex [UE 5.1 on Mac] /Users/Shared/Epic Games/UE_5.1/Engine/Plugins/Marketplace/
- Restart Unreal Engine.
- Click [Edit]>[Plugins] in that order from the Unreal Editor menu bar.
The Plugins window appears. -
Search for "mocopi", and confirm that "MocopiLiveLink" appears and is enabled (when installing to the Engine you need to enable it manually).
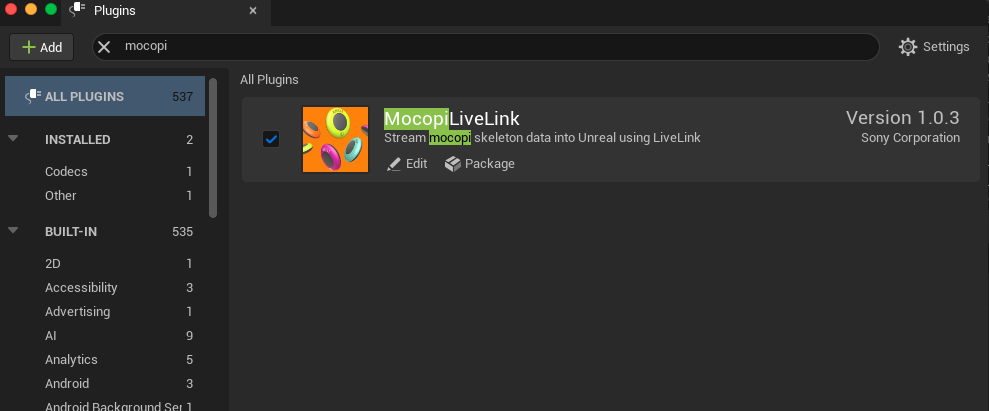
The Unreal Engine Plugin is now installed.
STEP 2: Receive and validate motion data
- Click [Window]>[Virtual Production]>[Live Link] in that order from the Unreal Editor menu bar.
The Live Link window appears. -
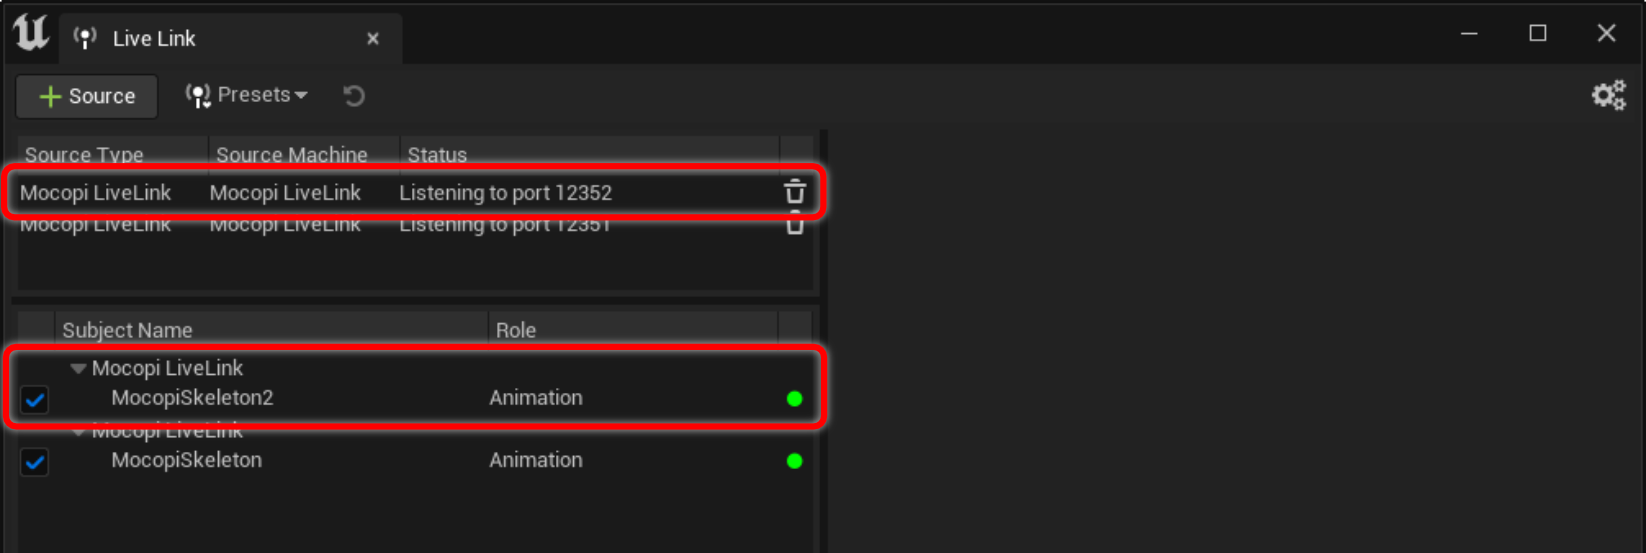
Click [+ Source]>[Mocopi LiveLink] in that order and set the following item.
- Port Number
Enter the port number to receive the data via UDP (initial value: 12351).
Enter the same number as the port number specified in the mocopi app. -
Subject Name
Check that it's "MocopiSkeleton".Reference
You are able to modify subject name. When you modify it, you must also modify the "ABP_Mocopi" blueprint included in the plugin.
- Port Number
-
Click [Create Mocopi Source] button.
The "Mocopi LiveLink" is added in the source section.

-
Operate the mocopi app to start the UDP transmission of the motion data.
When the Unreal Engine receives the motion data, the subject name of the Mocopi LiveLink source you created and a green indicator will appear in the subject panel of the Live Link window.
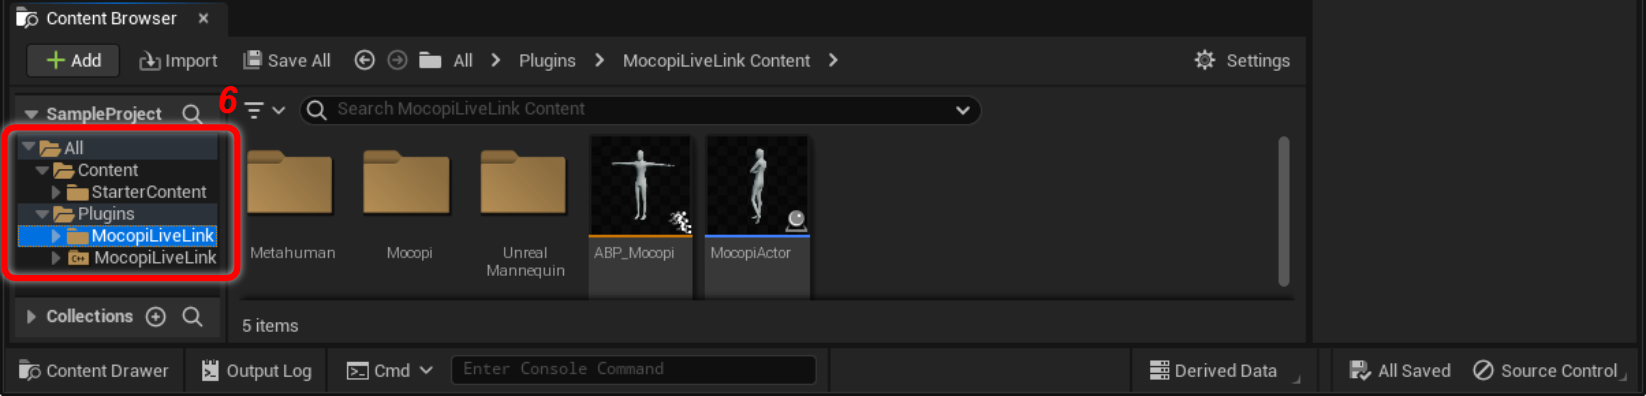
- Click [Window]>[Content Browser]>[Content Browser 1 - 4] in that order from the Unreal Editor menu bar.
The [Content Browser] tab/window appears. -
Open [All]>[Plugins]>[MocopiLiveLink Content] in that order in the left pane of the [Content Browser] tab/window.
Reference
- If you don't see the [MocopiLiveLink Content] in the left pane of the [Content Browser] tab/window:
Click [Settings] on the top right of the tab/window, and check [Show Plugin Content]. - If you installed the plugin to the Unreal Engine's Plugins folder:
Click [Settings] and check [Show Engine Content]. Open [All]>[Engine]>[Plugins]>[MocopiLiveLink Content].
- If you don't see the [MocopiLiveLink Content] in the left pane of the [Content Browser] tab/window:
-
Double-click the "ABP_Mocopi" blueprint to view the animation.
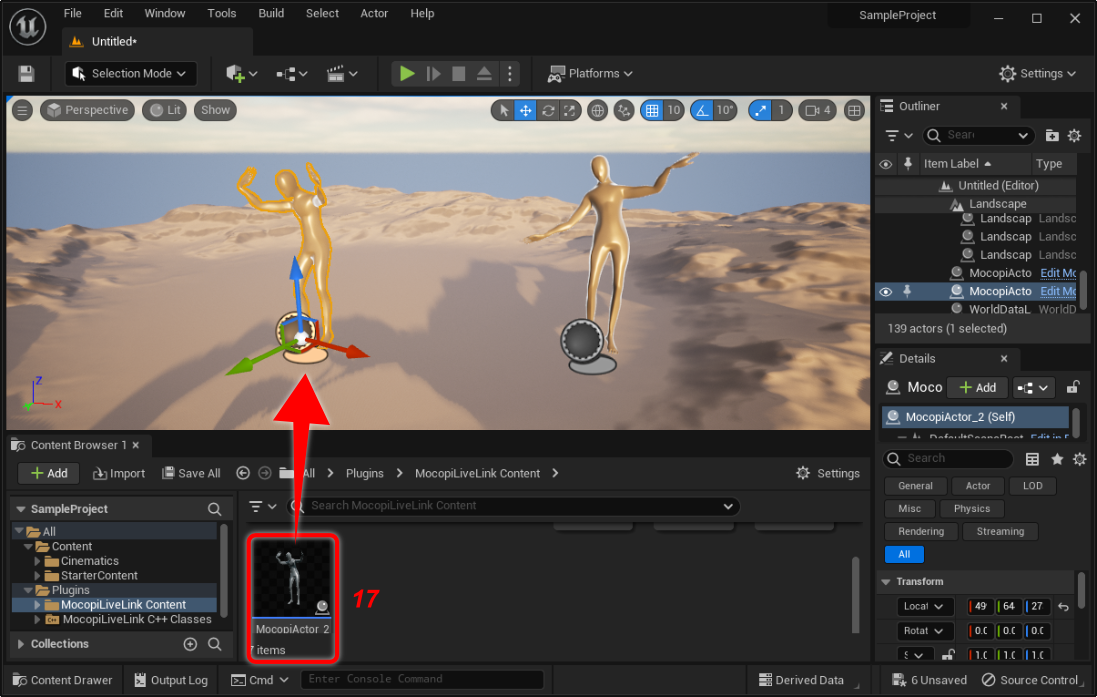
Alternatively, drag and drop the "MocopiActor" blueprint into your scene.
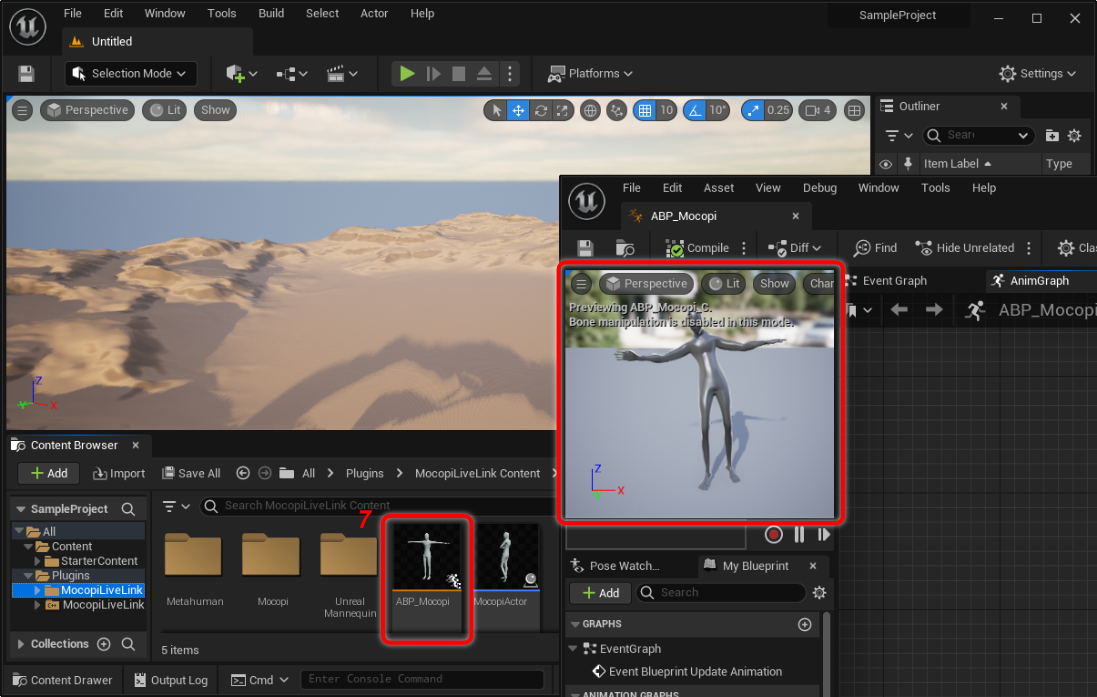 The actor animates on the scene according to motion data.
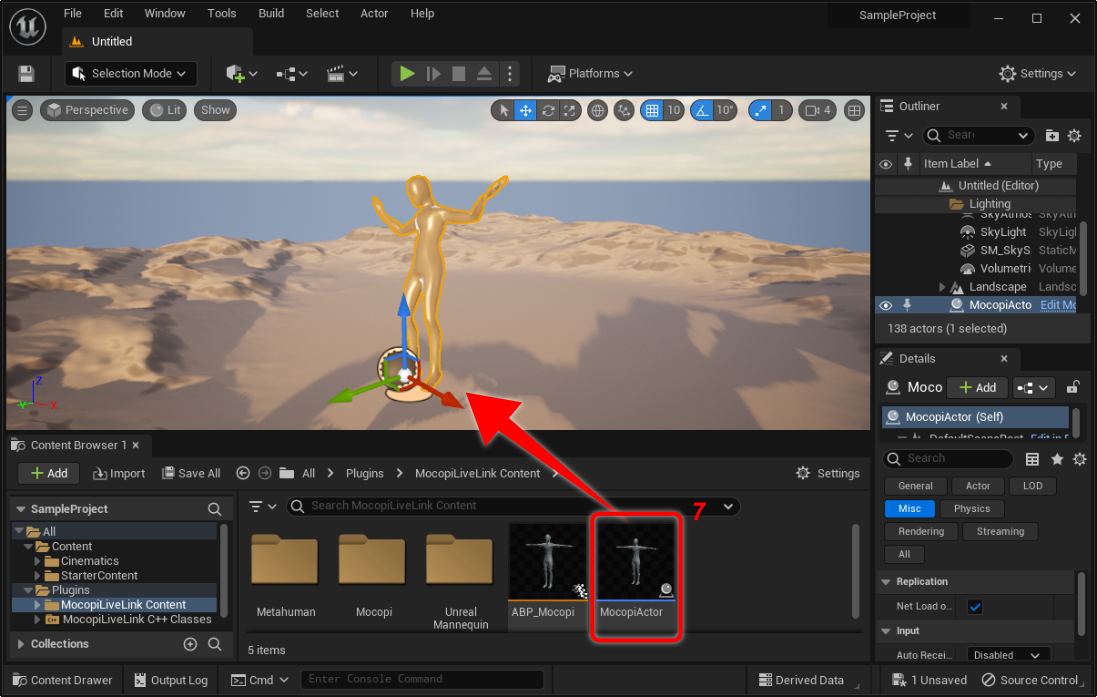
The motion data has now been received and validated.
Reference
When receiving motion data of multiple players (multiple mocopi apps), refer to How to receive multiple data streams.
STEP 3: Record the motion data and create an animation sequence
You can record motion data (actor's movements) and create animation sequences, using the following procedure.
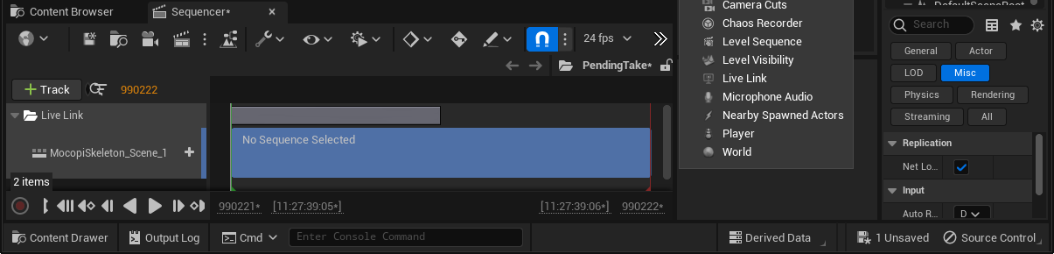
- During the reception of motion data, click [Window]>[Cinematics]>[Take Recorder] in that order from the Unreal Editor menu bar.
The [Take Recorder] tab/window appears. -
Click [+ Source]>[From LiveLink]>[MocopiSkeleton] in that order.
The "MocopiSkeleton" is added in the source section.
-
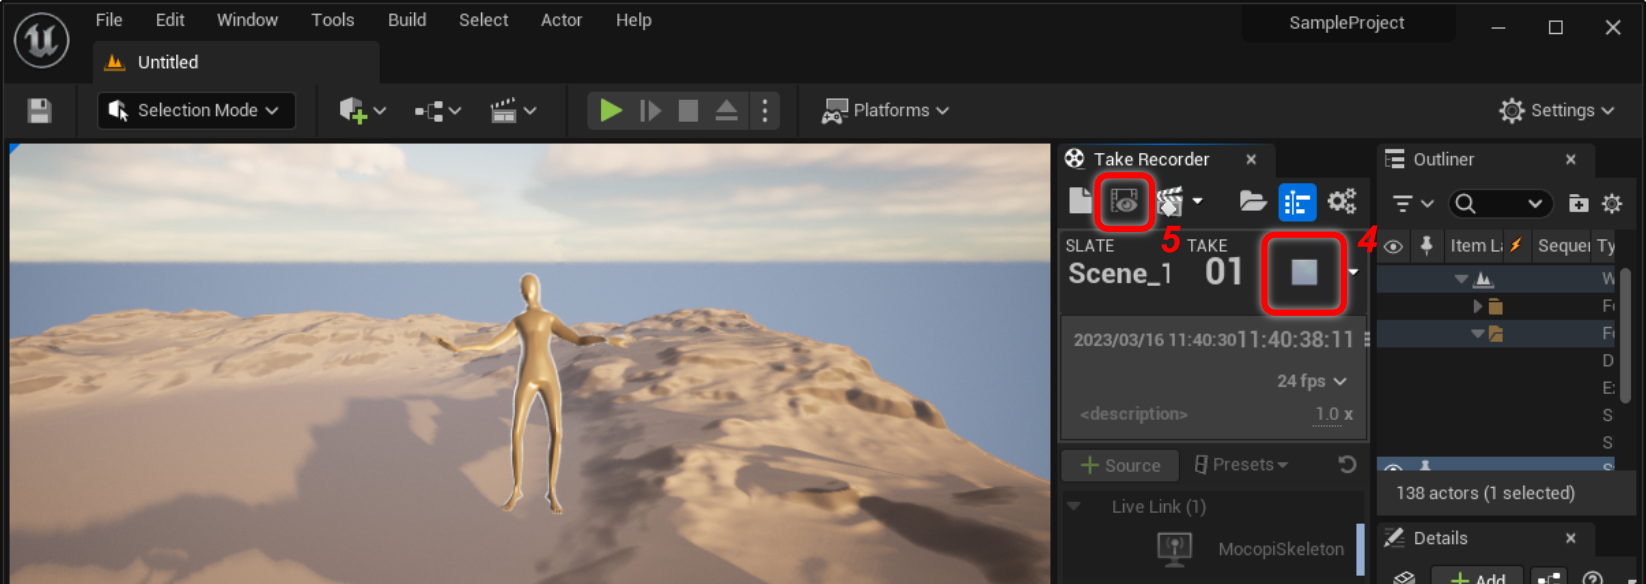
Click the Record button.
It will start recording after a 3 second countdown.

- Click the Stop button to stop the recording.
-
Click the "Review Last Recording" icon on the top left.
Your recording take appears in the [Sequencer] tab/window.
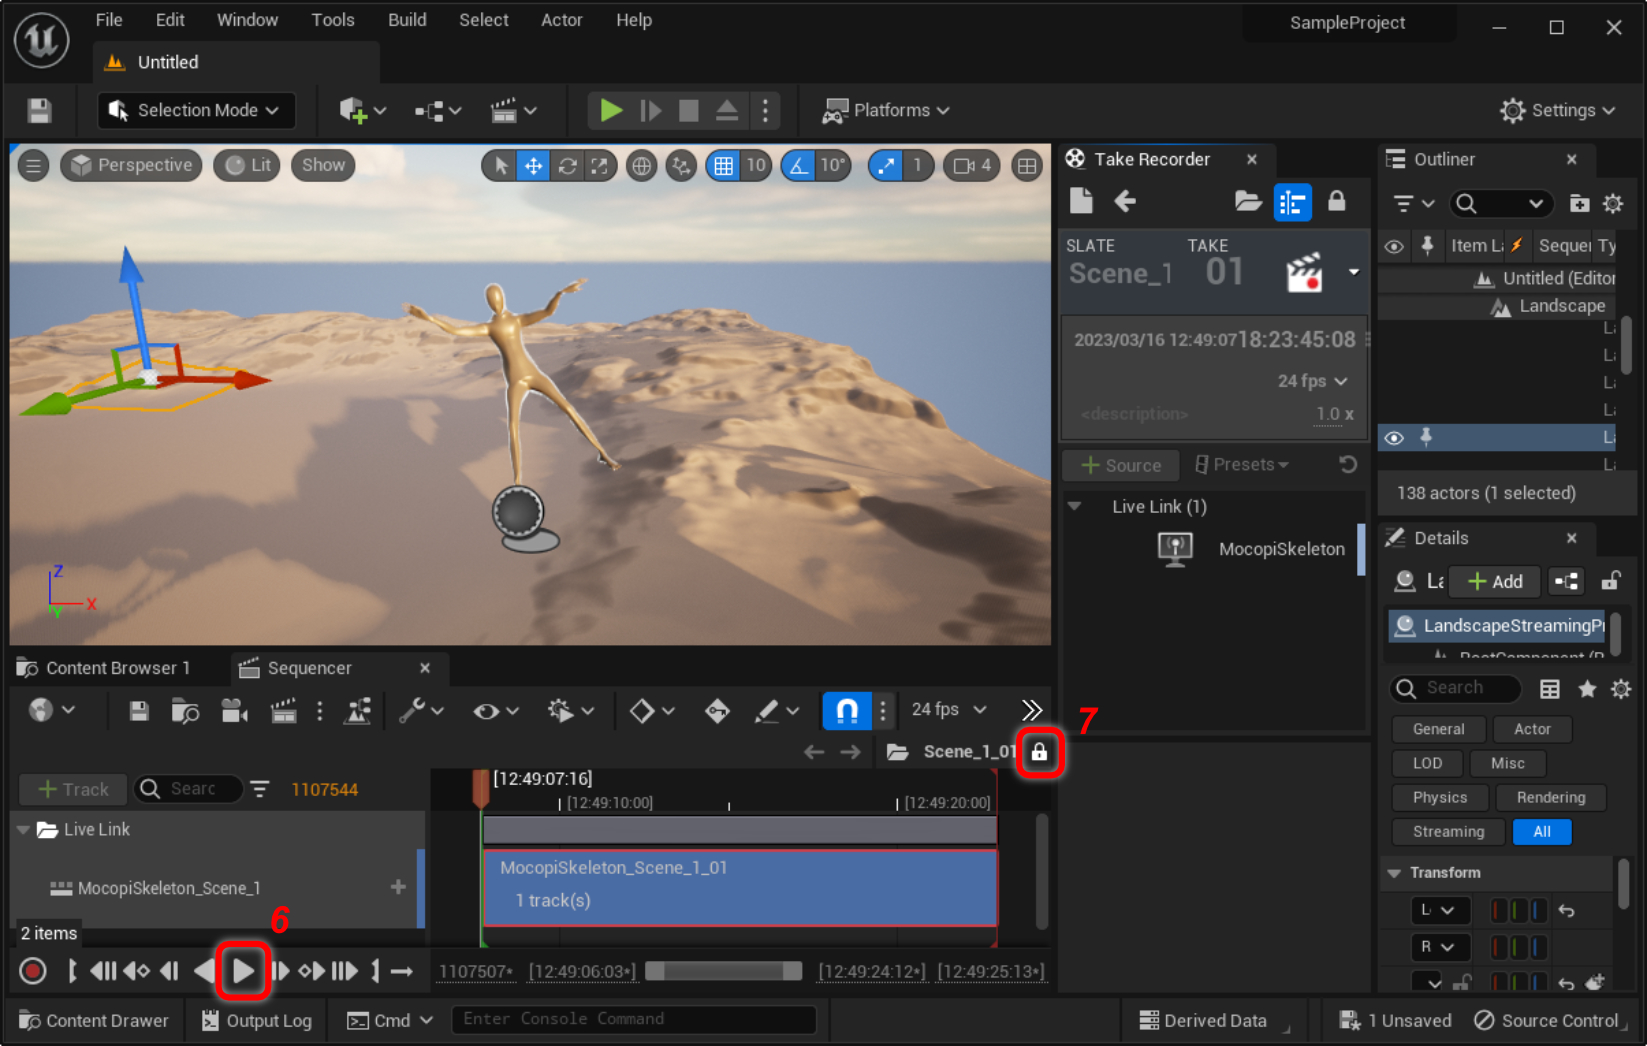
- Click the Play button.
The recorded take is played back.
If you wish to re-record, click the "Return" icon in the top left of the [Take Recorder] tab/window and repeat the procedure from step 3. -
Once you have a recording that you like, click the "Lock" icon in the top right of the [Sequencer] tab/window.
The animation will be editable.
-
Display the [Content Browser] tab/window, and drag and drop the "MocopiActor" blueprint under the recorded take in the [Sequencer] tab/window.

-
Right click the [MocopiActor] in the [Sequencer] tab/window, and click "Bake Animation Sequence".
The Create a New Animation Asset window appears.
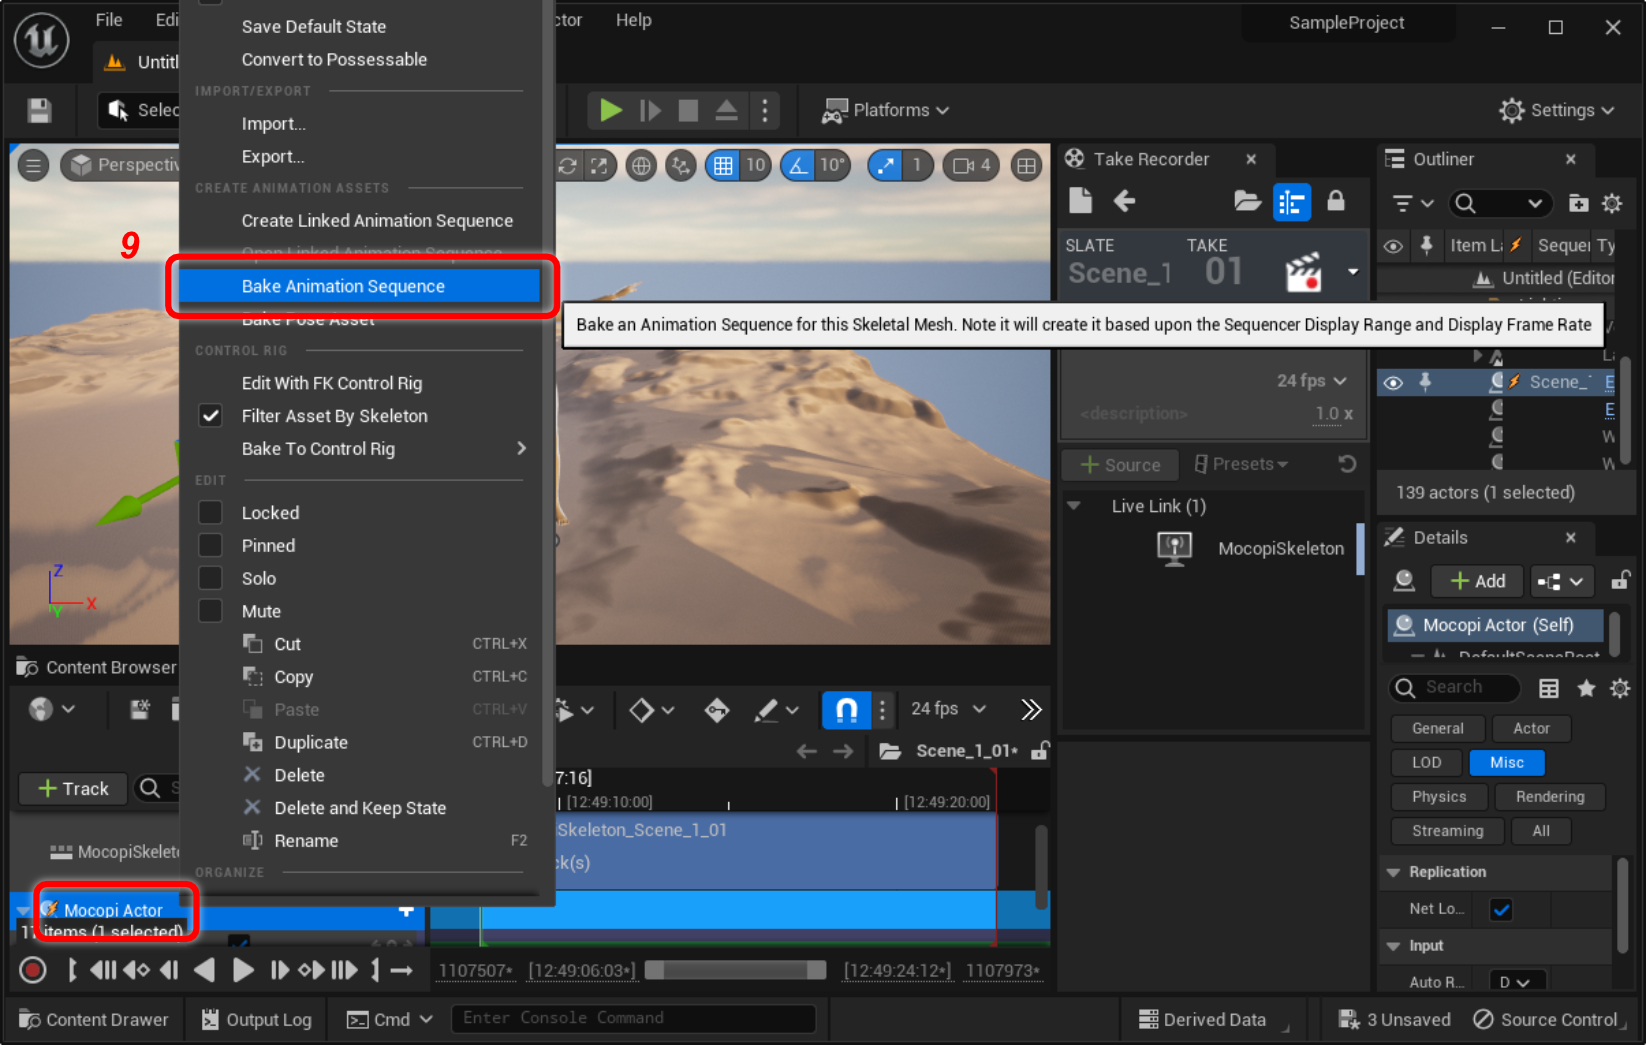
- Select the destination folder, and enter a meaningful animation name in the "Animation Name" field.
-
Click [OK].
The Animation Sequence Options window appears.

-
Click [Export To Animation Sequence] button.

You are done recording motion data and creating an animation sequence.
Reference
How to receive multiple data streams
You can receive motion data from multiple mocopi apps using the following procedure.
Caution
A different port number for receiving via UDP must be specified for each mocopi app.
- Refer to Step 5 of the Advance Preparations for the state in which motion data can be sent using UDP from the mocopi app to be added.
-
Refer to STEP 2: Procedures 1 to 4 of Receive and validate motion data to receive the motion data from the new Mocopi LiveLink source.
-
Refer to STEP 2: Procedures 5 and 6 of Receive and validate motion data to open the [MocopiLiveLink Content] in the [Content Browser] tab/window.

- Right-click on the selected "ABP_Mocopi" and "MocopiActor" blueprints and click [Duplicate].
Blueprints are duplicated. - Double-click the duplicated "ABP_Mocopi" blueprint.
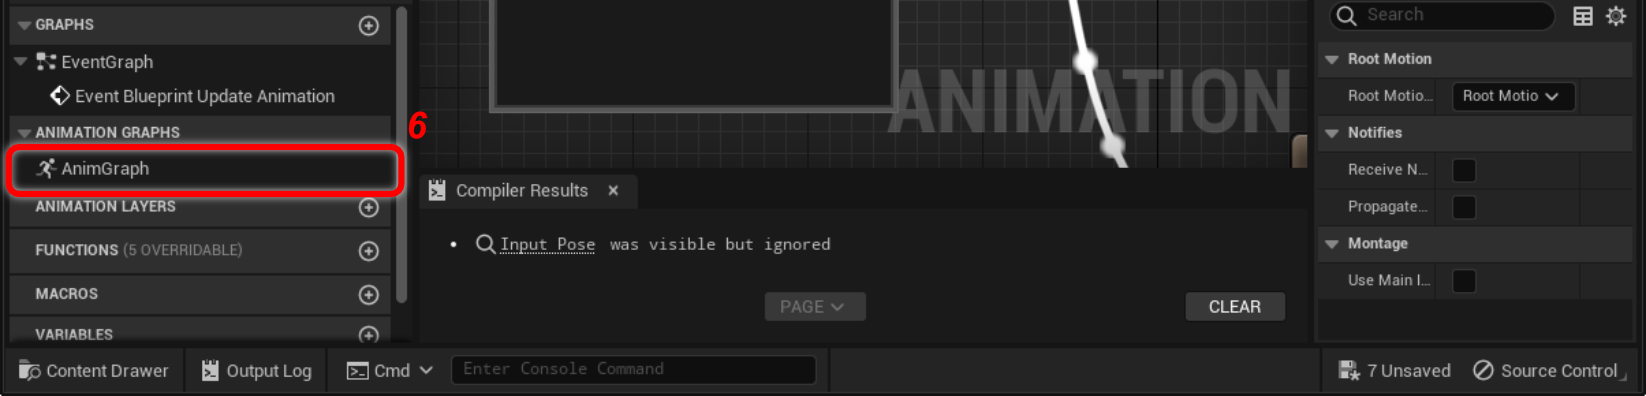
The "ABP_Mocopi_x" window (x represents the number) appears. - Double-click [AnimGraph].
The "AnimGraph" tab appears. - Select the Live Link subject name for the new mocopi source from the drop-down menu in the "LiveLink Pose" node.
This is how you can tie data streams into your own blueprint. - Click [Compile] button.
- Click the "Save" icon.
-
Click [x] in the upper right corner of the screen.
- Double-click the duplicated "MocopiActor" blueprint.
The "MocopiActor_x" window (x represents the number) appears. - Click [SkeletalMesh] in the [Components] tab.
- Select the duplicated "ABP_Mocopi_x" blueprint (Step 4 above) from pulldown menu under the [Details tab]>[Animation]>[Anim Class].
- Click [Compile] button.
- Click the "Save" icon.
-
Click [x] in the upper right corner of the screen.

-
Drag and drop the duplicated "MocopiActor" blueprint into your scene.
Multiple actors animate on the scene according to each motion data.