Moving an Actor using Maya Plugin
Here we will guide you to install the Maya Plugin in Maya to try and make a 3D avatar move.
Reference
Advance Preparations
Prepare to use the Maya Plugin using the following procedure.
- Connect the PC (Windows/Mac) on which Maya is installed to the local network.
- Access the Downloads page and download the latest version of the Maya Plugin.
- Extract the downloaded ZIP file to any folder.
For details about the distributed data, refer to Content of the distributed data. - Connect the smartphone on which the mocopi app is installed to the local network.
- Refer to Sending Data from a mocopi App for the state in which motion data can be sent using UDP from a mocopi app.
Specify the IP address of the PC on which Maya is installed in the "IP" field, the port number (initial value: 12351) to use in the "Port" field, and "mocopi (UDP)" for the send format.
The advance preparations are now complete.
STEP 1: Install the Maya Plugin
Note: It is assumed that you already have the Autodesk Maya software installed on your computer.
-
To install the Maya Plugin, simply copy the contents of the mocopi Maya Plugin zip extracted in Step 3 of the Advance Preparations into your Maya modules directory.
Reference
- Remember to get the plugin version that matches the platform that you will be working on (mocopi Maya plugin for Windows or mocopi Maya plugin for Mac)
-
Copy the “MocopiMayaPlugin.mod” file and the “MocopiMayaPlugin” directory to the Maya “modules” directory. If this folder does not exist, please create it.
Maya “modules” directory path
The recommended paths are:Windows path: /Documents/maya/modules
Mac path: /Users/Shared/Autodesk/modules/maya
On Mac, you may be required to enter your Admin password, to copy files to that path.Alternatively, you can use getenv "MAYA_MODULE_PATH” inside of Maya to print out all the module path options.
- Start or Restart Maya
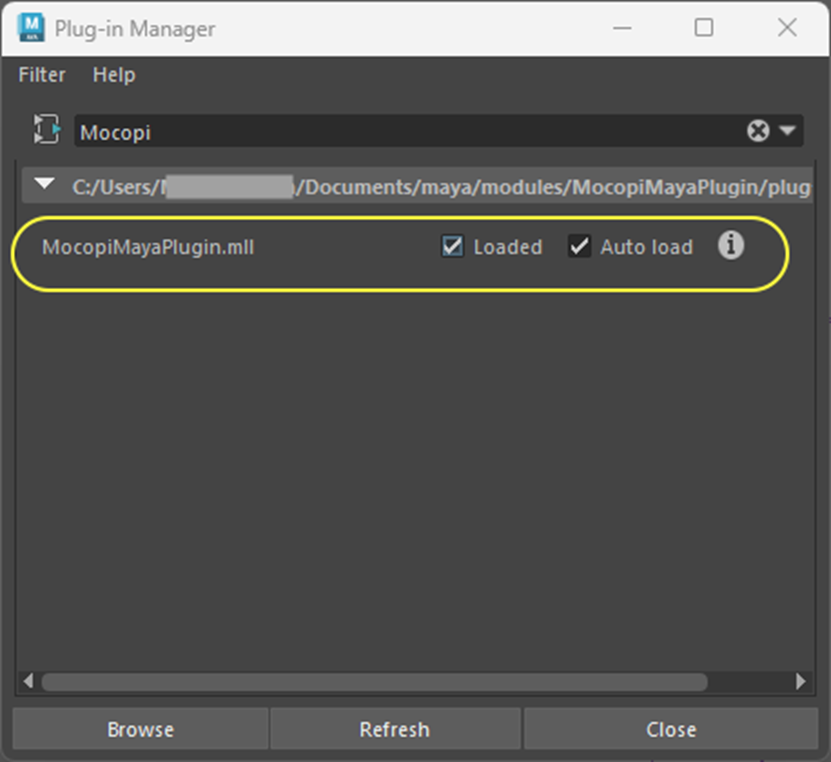
- Click [Windows]>[Settings/Preferences]> [Plug-in Manager] from the Maya menu bar.
The Plug-in Manager window appears. -
Search for “Mocopi” and confirm that the “MocopiMayaPlugin” appears and has the “Loaded” and “Auto load” checkboxes checked.
-
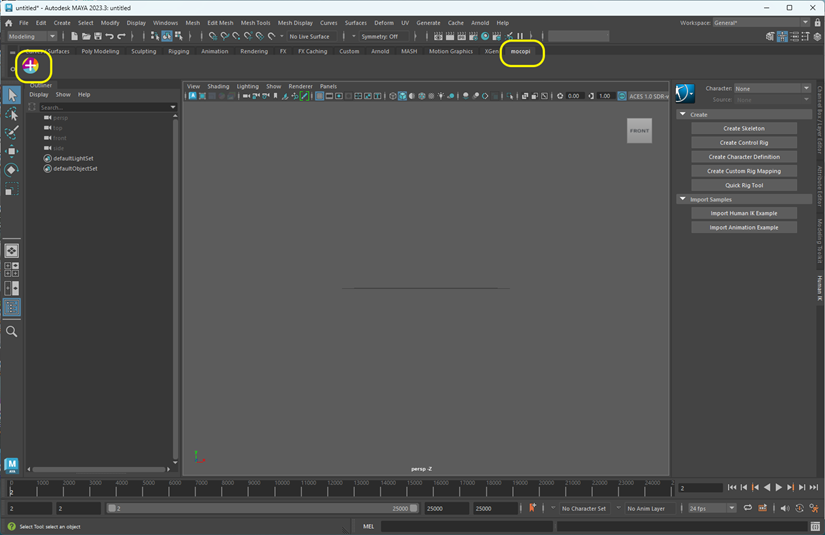
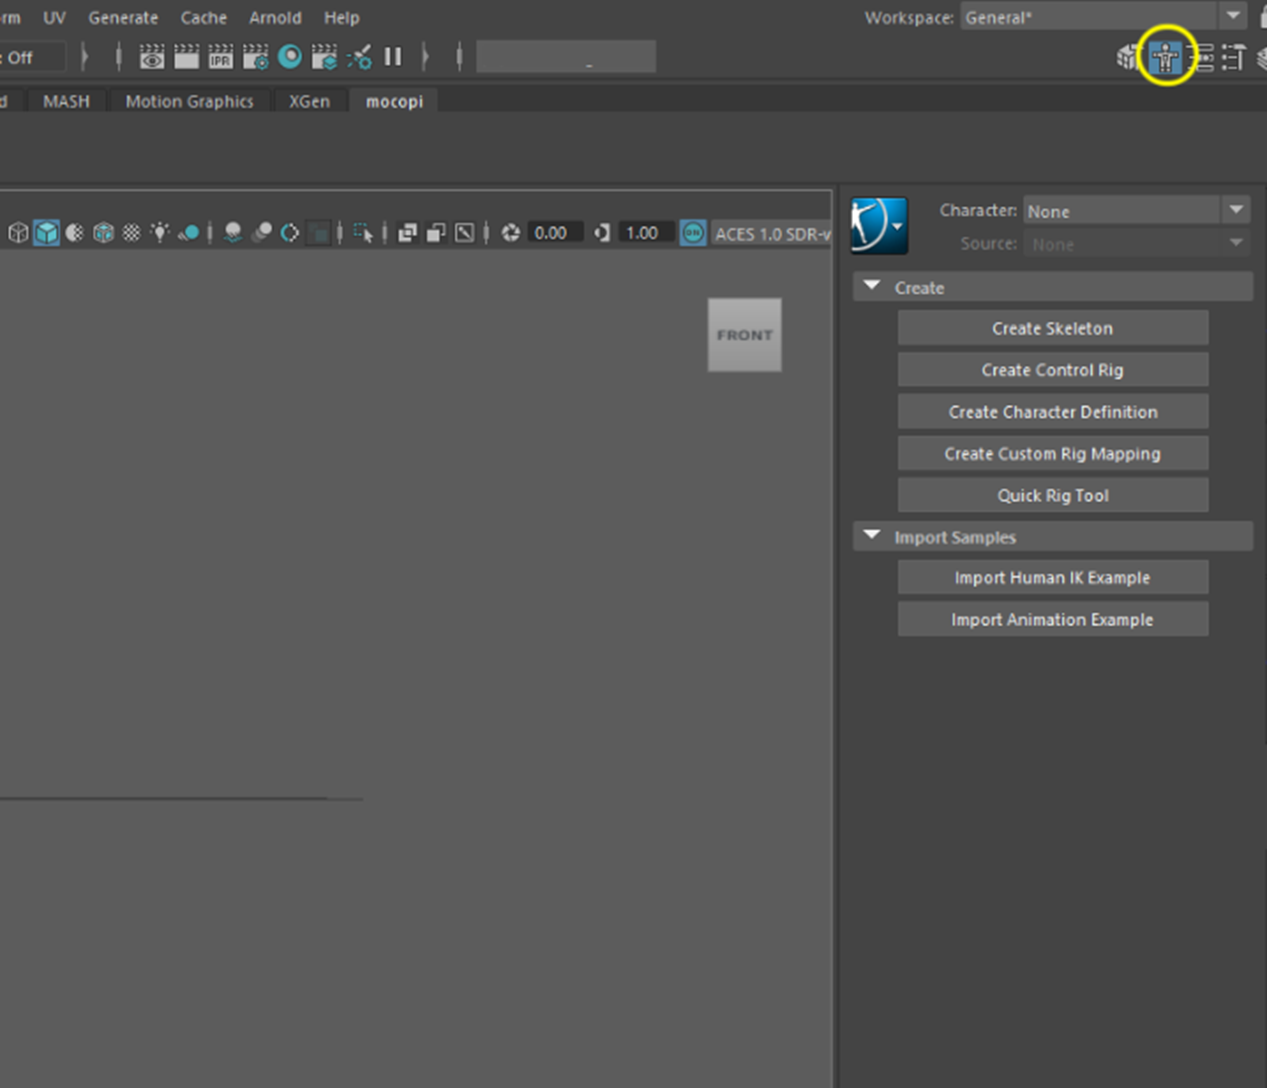
Upon loading the plug-in, the “mocopi” tab will appear in your main Maya shelf.
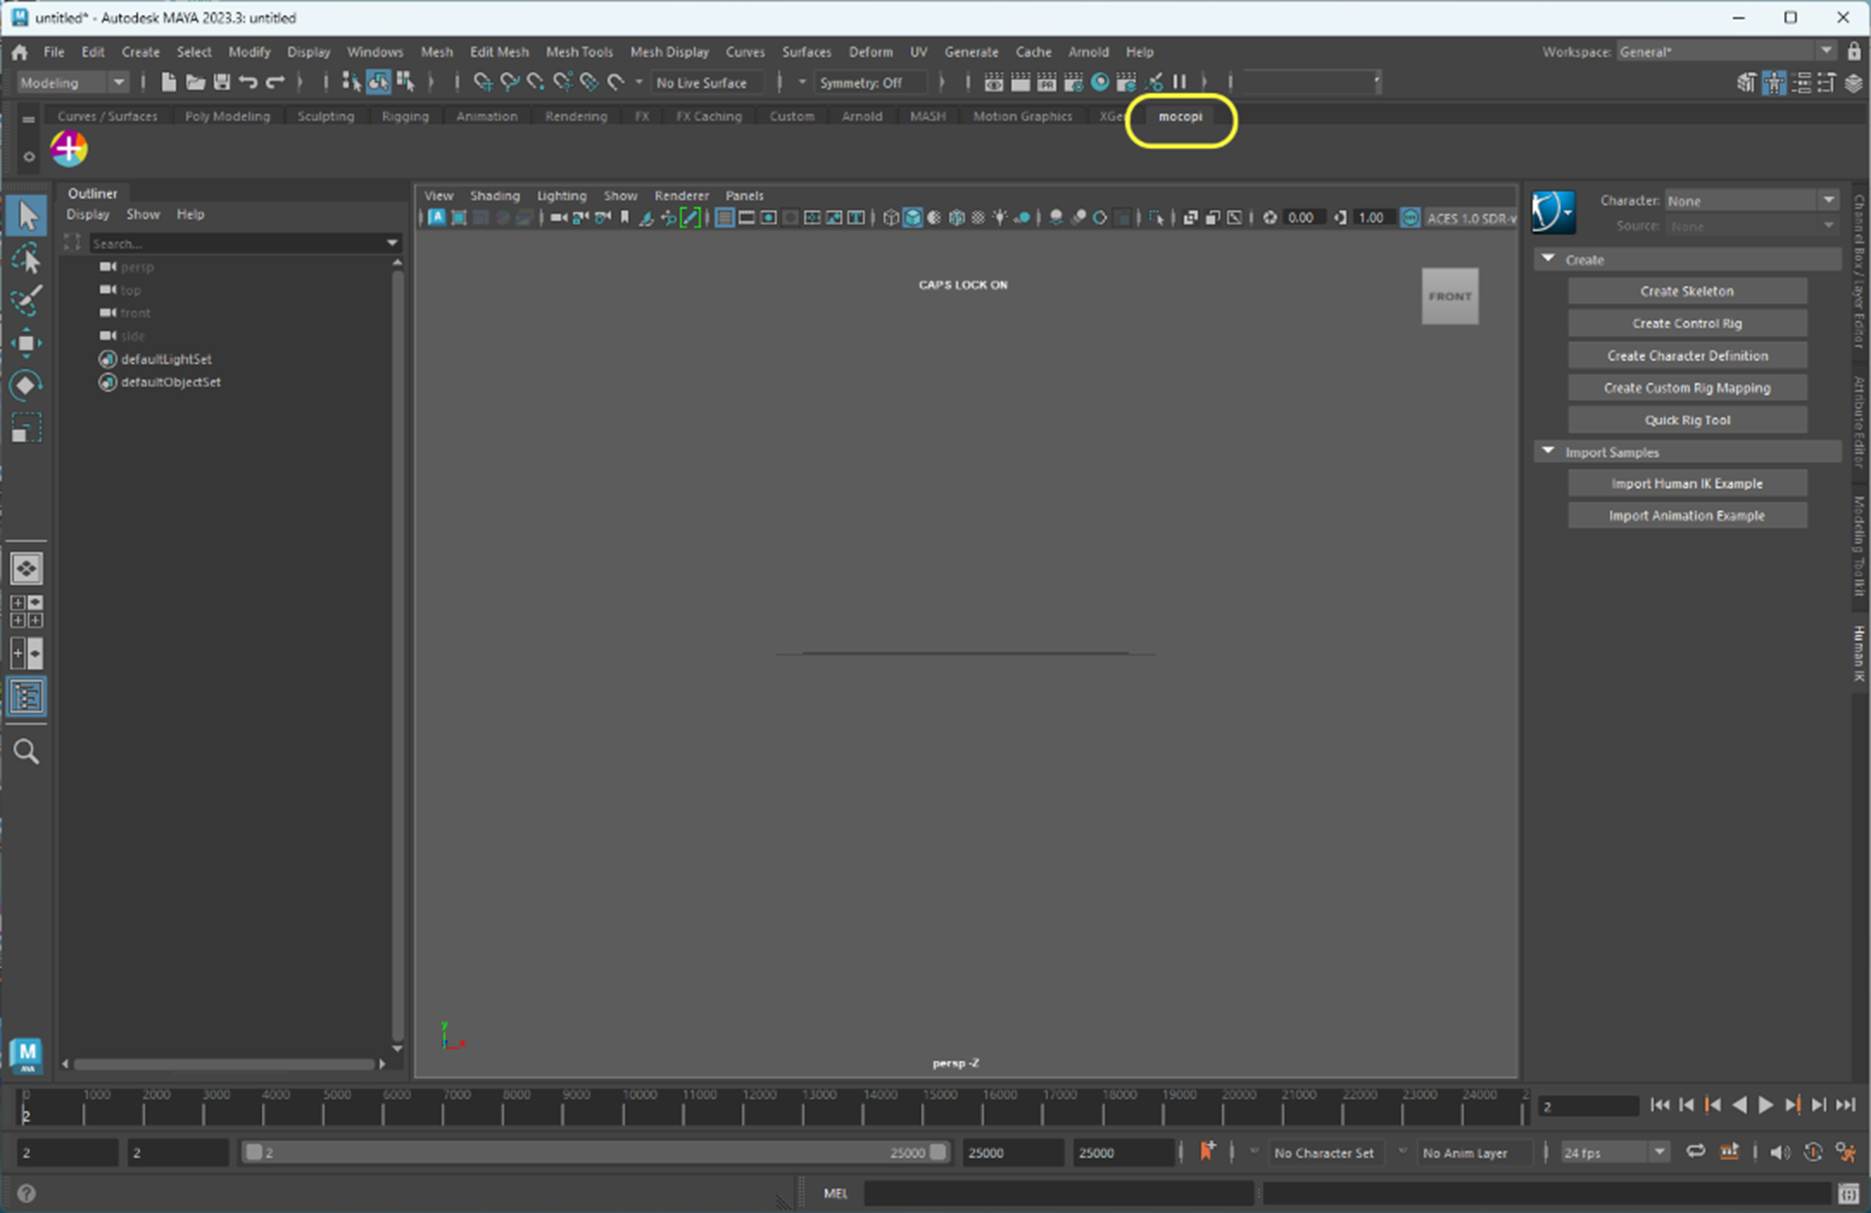
The Maya Plugin is installed now.
STEP 2: Receive and validate motion data
- Ensure the mocopi shelf is selected
-
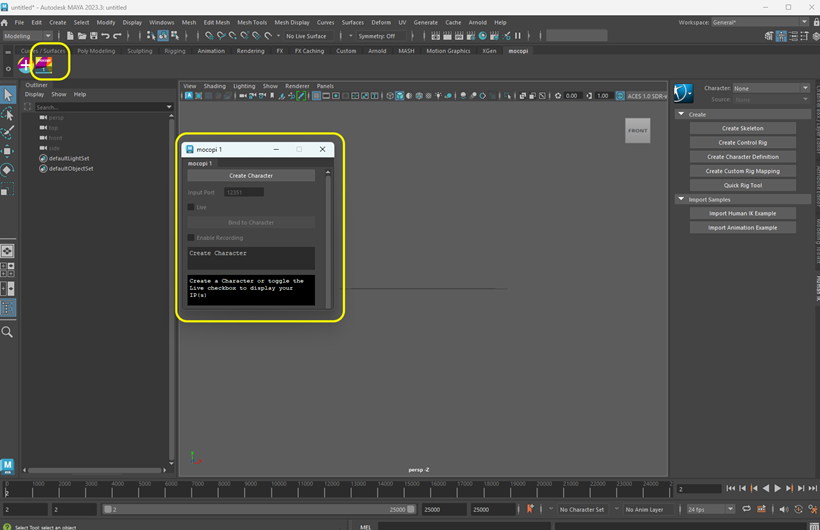
Click the “+” button on the mocopi shelf area to create a new mocopi source (top left portion of viewer window)
-
After pressing the “+” button, a new “mocopi” window will be shown and a source with the source number will be shown next to the “+” button.
-
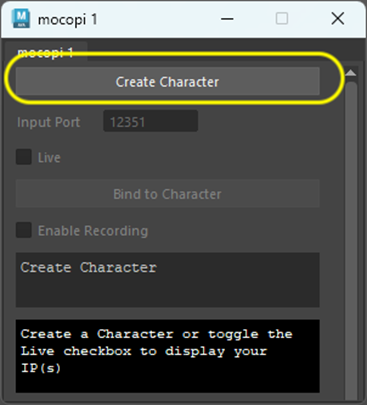
Press the “Create Character” to create a new skeleton and an HIK character*.
Reference
-
If you get any errors while trying to create a character, press the HIK button at the top right first, then press Create Character again.
-
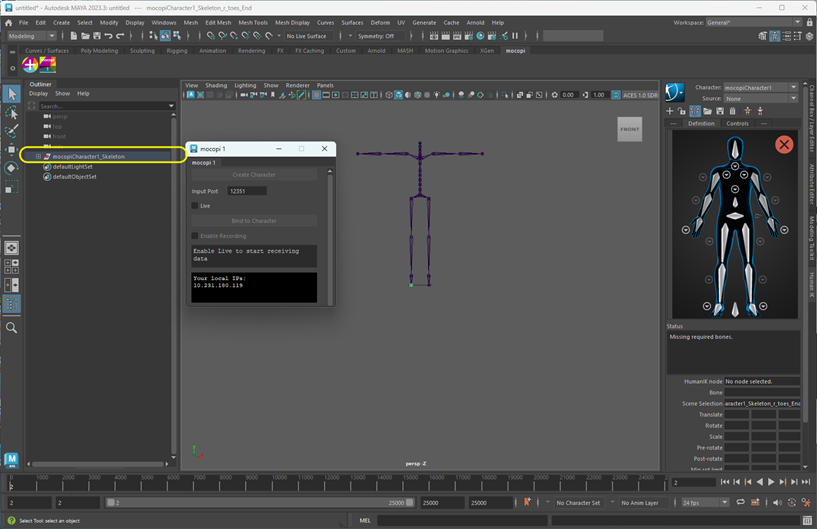
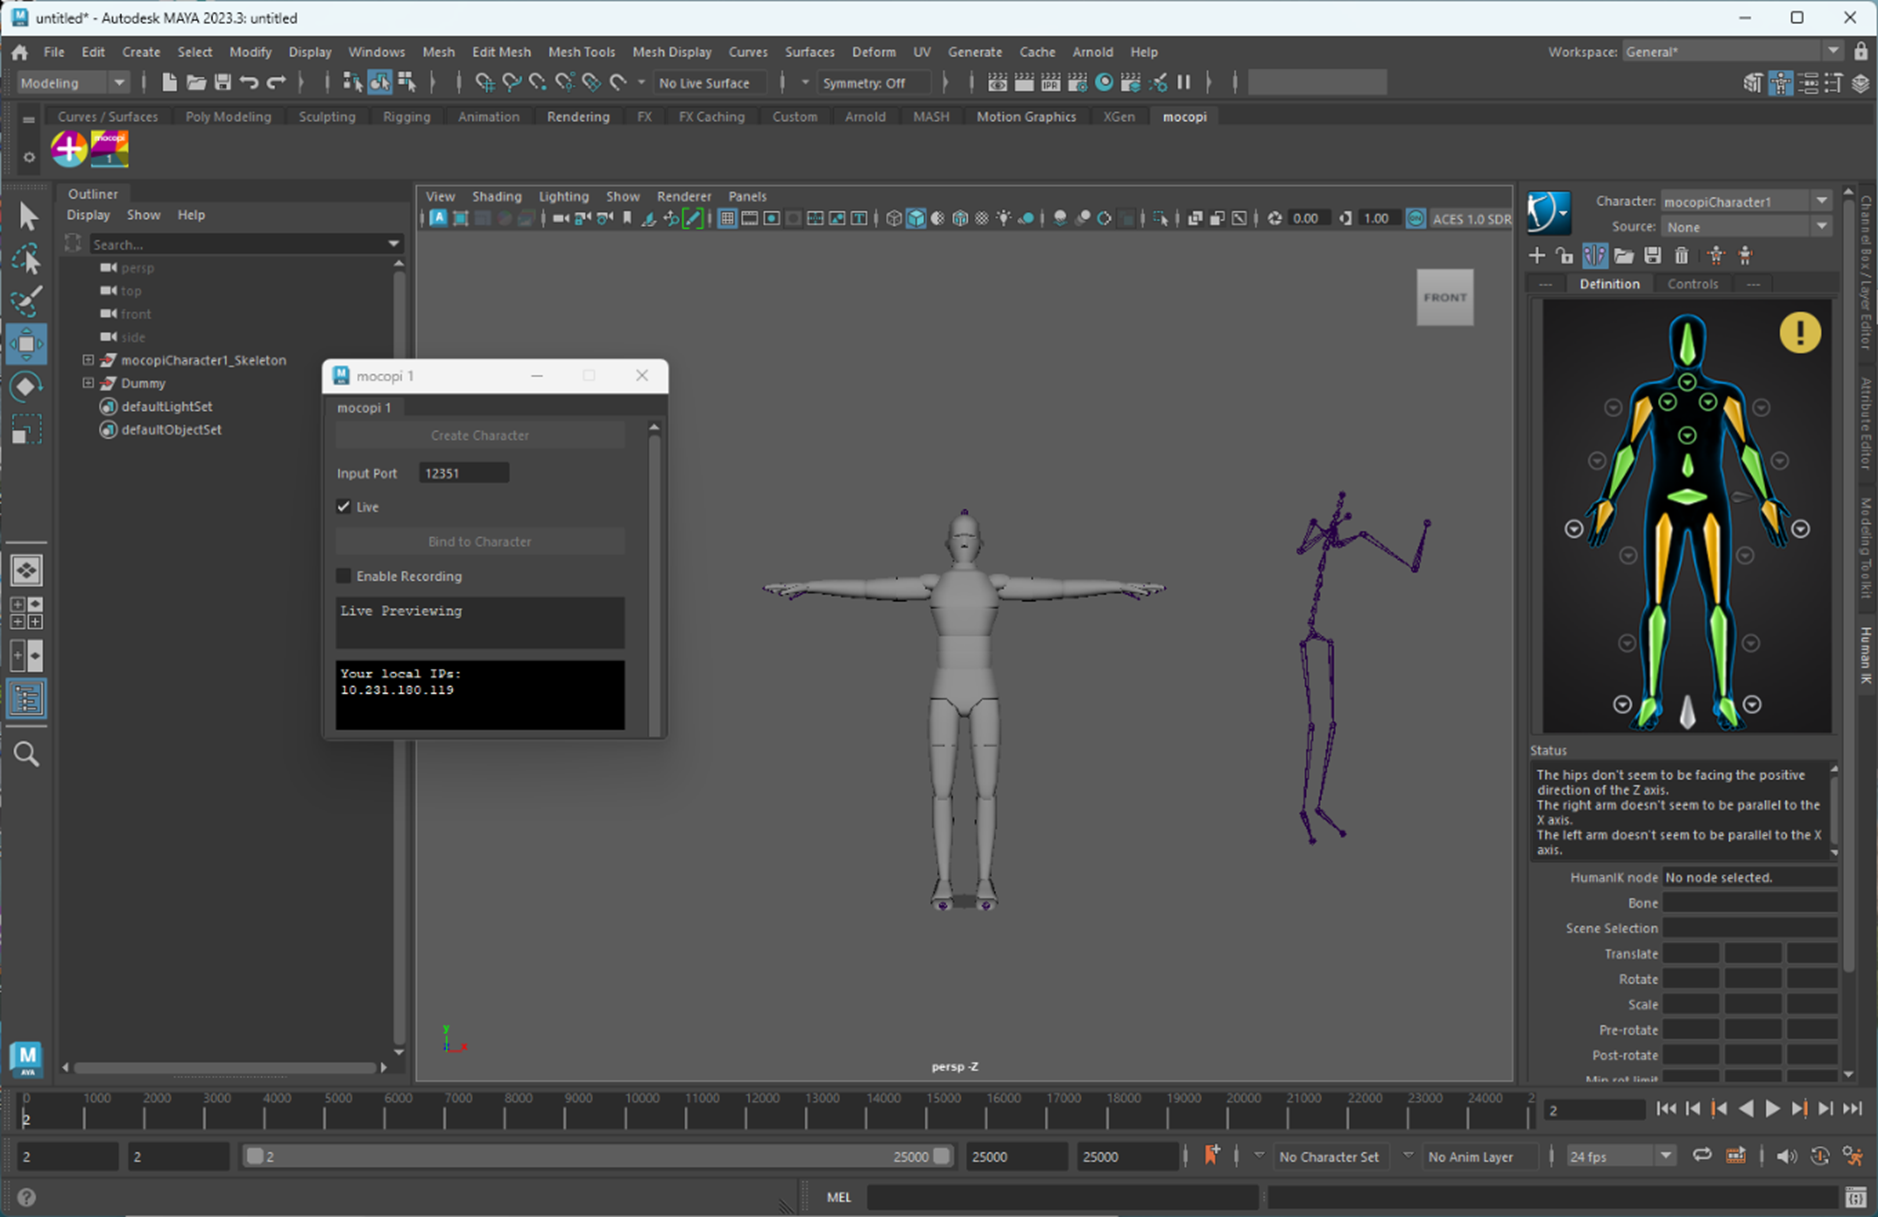
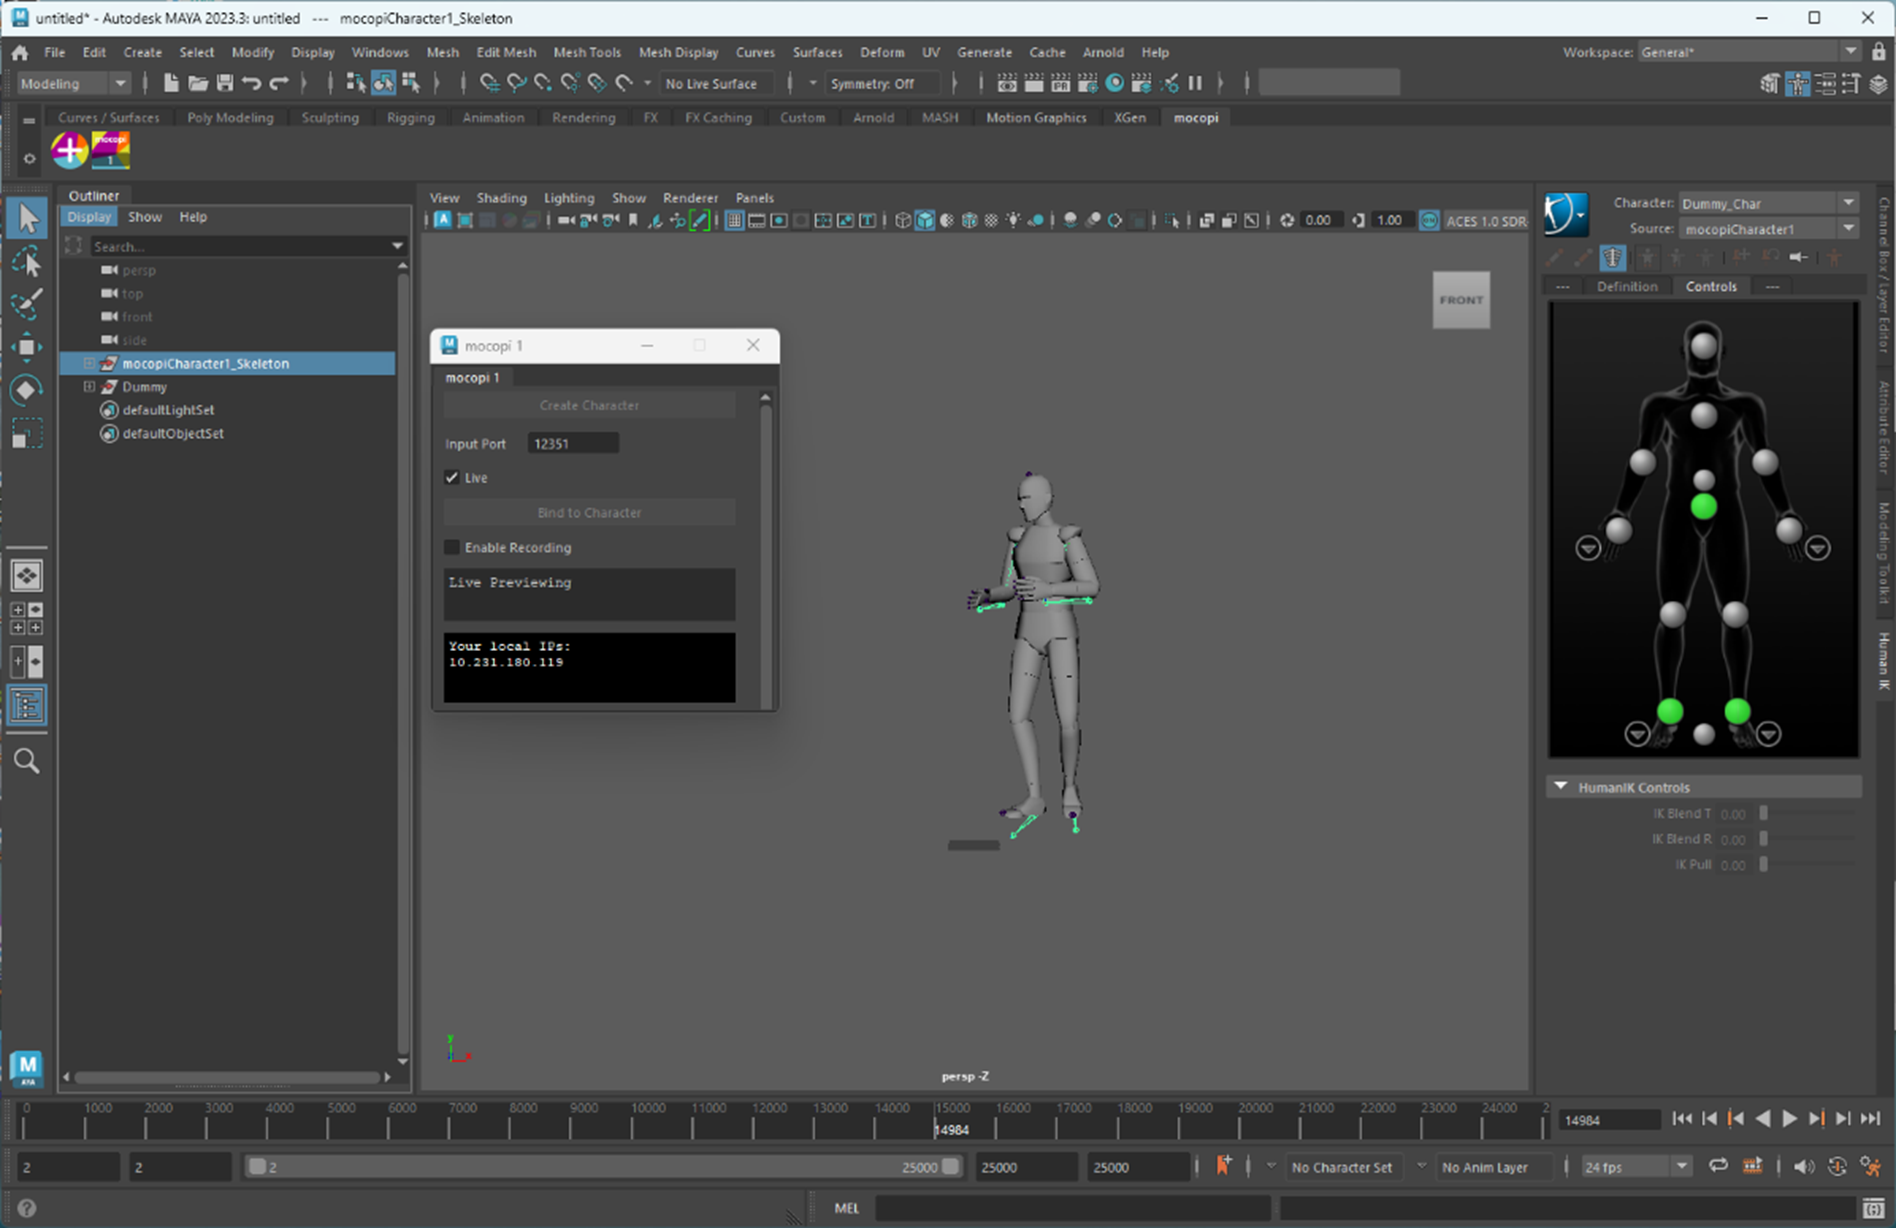
The image below shows how a mocopiCharacter gets added to the Outliner after successfully creating the character
-
If you get any errors while trying to create a character, press the HIK button at the top right first, then press Create Character again.
-
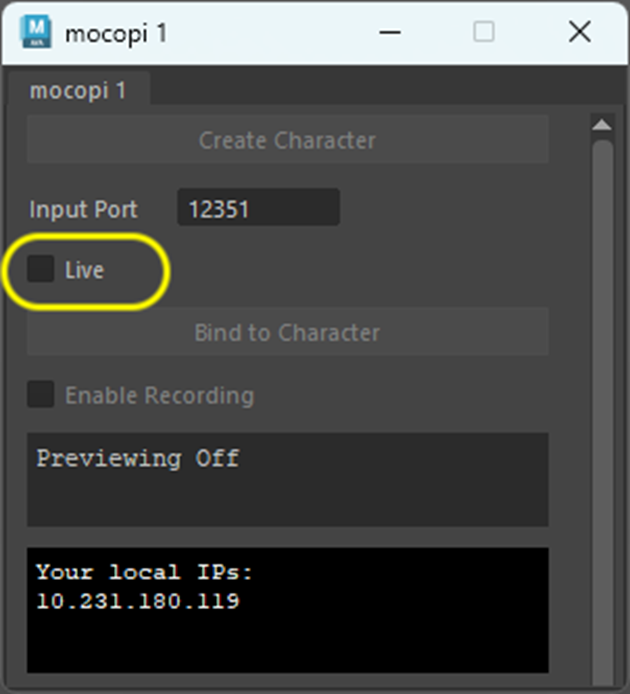
Now set the Input port
Input port number
Enter the port number to receive the motion data via UDP (initial/default value: 12351) then Press Enter.
Make sure to match the port number to the port number specified in the mocopi mobile app Streaming configuration.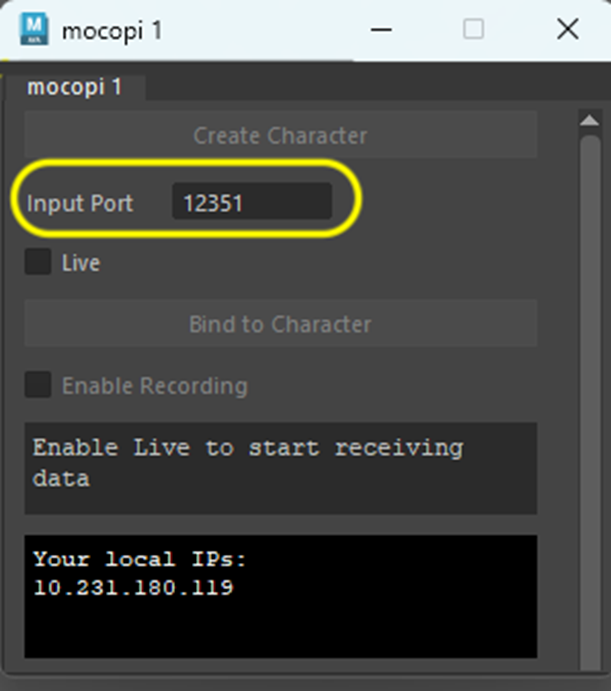
Reference
- If you get an error related to “Port initialization”, make sure the port entered is not being used by other application or other mocopi source in your computer.
- You don't need to change the port if you haven’t changed the default port on the Mocopi mobile app.
-
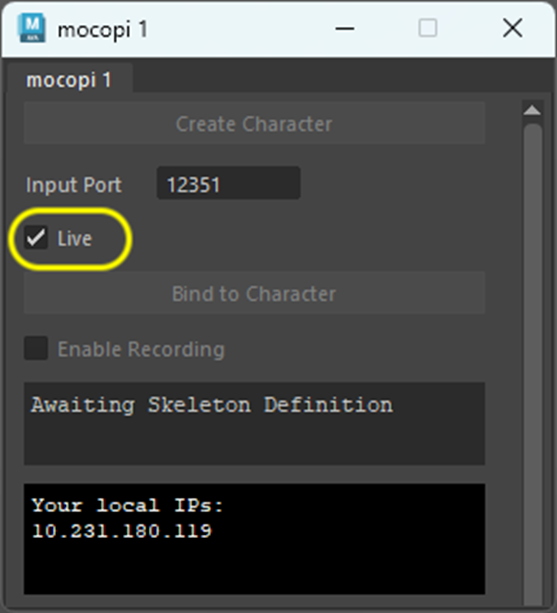
Once you have set the desired port, check the "Live" checkbox to start receiving motion data in Maya
-
Operate the mocopi app to start the UDP transmission of the motion data.
If everything is configured correctly and the motion data is received correctly in Maya, you should see the “Bind to Character” button enabled.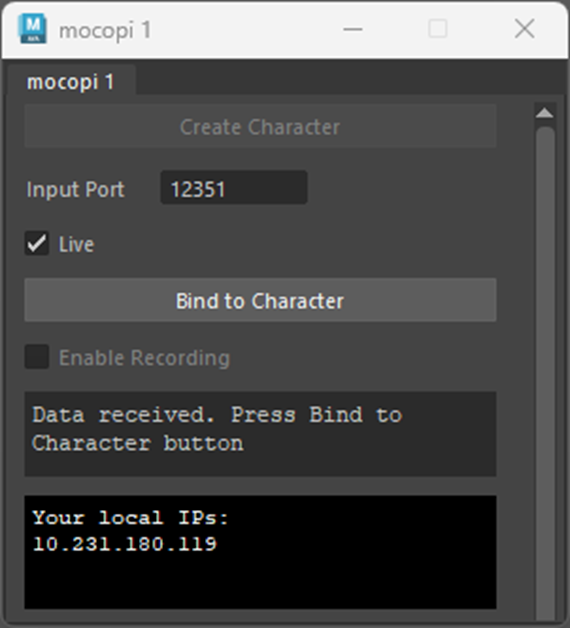
-
Press the “Bind to Character” button, and you should see the motion data reflected on the scene.
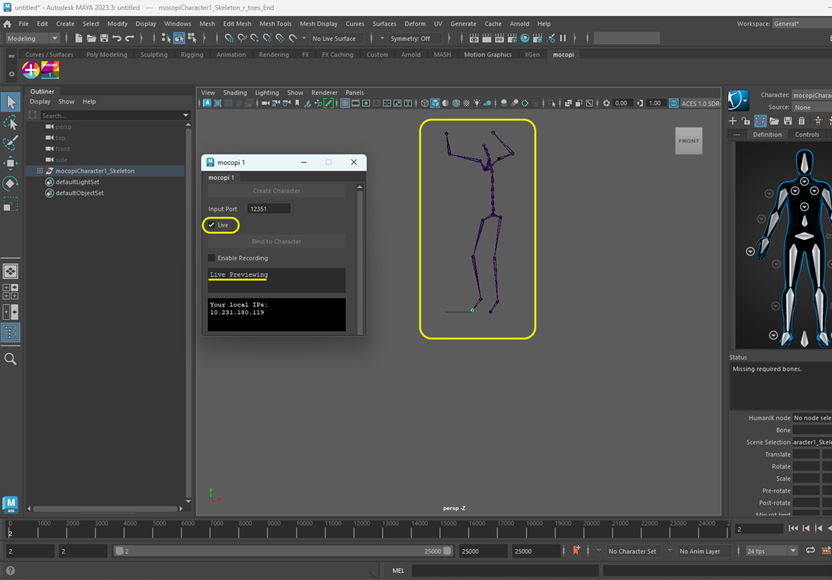
The 3D character animates on the scene according to the motion data of the actor wearing the mocopi sensors.
The motion data has now been received and validated. -
If you need to Pause the motion data preview, simply uncheck the Live toggle.
Reference
- On the mocopi app: If you forgot to calibrate before you Started Streaming motion data, you can Stop streaming, calibrate and then Start Streaming again, or you could Reset Pose while you’re streaming motion data.
- If you don’t see your movements in Maya, after you pressed Start Streaming on the mocopi mobile app, please check the IP and Port configuration on the App and try again. The IP should match the network IP of the computer where Maya is running, as shown on the bottom left area of the mocopi window and the port should match what you entered in Maya, as described in Step 5 above.
- If you do not see the ‘skeleton’ you may need to use your moue to zoom in/out to bring the skeleton into view
- If you need to receive motion data from multiple actors (multiple mocopi apps and sensors), please refer to How to receive multiple data streams.
STEP 3: Animate 3D Characters
- Create a mocopi source and start receiving motion data, as described in “STEP 2: Receive and validate motion data”.
-
Import into your scene a properly rigged 3D character, which you will animate with mocopi. As an example, here we imported the Dummy 3D character that Maya provides, just to show how this process works.
- Click on “Textured” (checkboard appearance button) button to apply textures to the 3D character (this does not make a difference on the Dummy character example, but it will most likely have an effect on your 3D character).
-
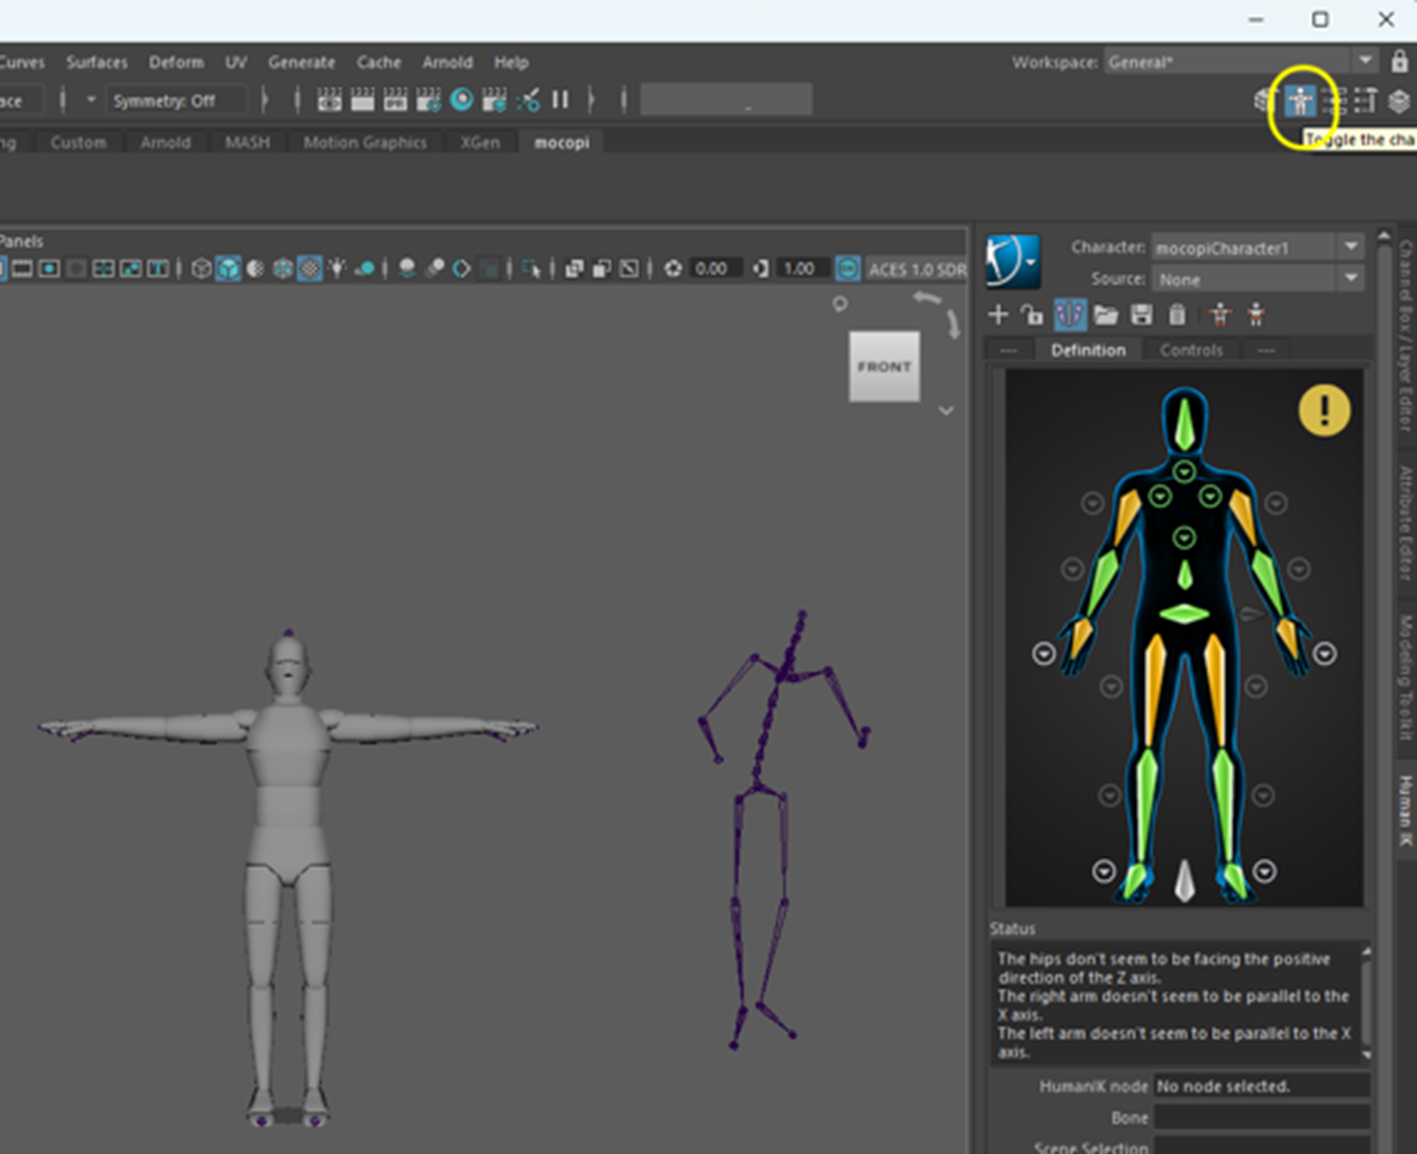
Open the HumanIK menu, you can do it from Maya menu bar or just clicking on the button that is specific for it.
Maya menu bar: Click [Windows] > [Animation Editors] > [HumanIK]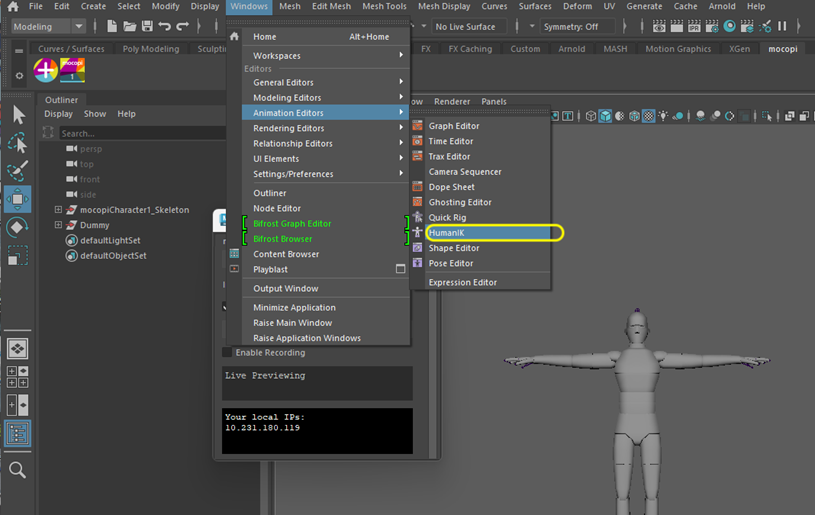
-
On the HIK editor, set the following:
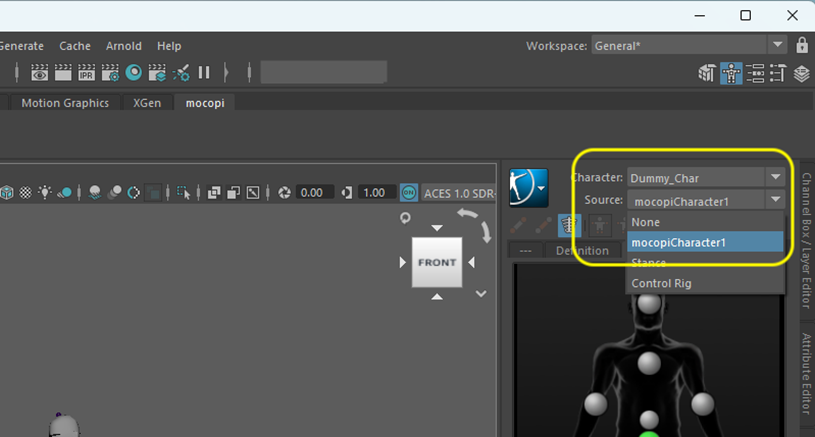
- Character: select the rigged character that you want to animate, that is the character that you imported in Step #2.
-
Source: Select the mocopi source that is already present in the scene, for example “mocopiCharacter1”.
Reference
Please note that a mocopi Character needs to receive motion data before this can be assigned as source to animate another character.
-
Confirm that the 3D character is moving with the motion from the mocopi sensors
-
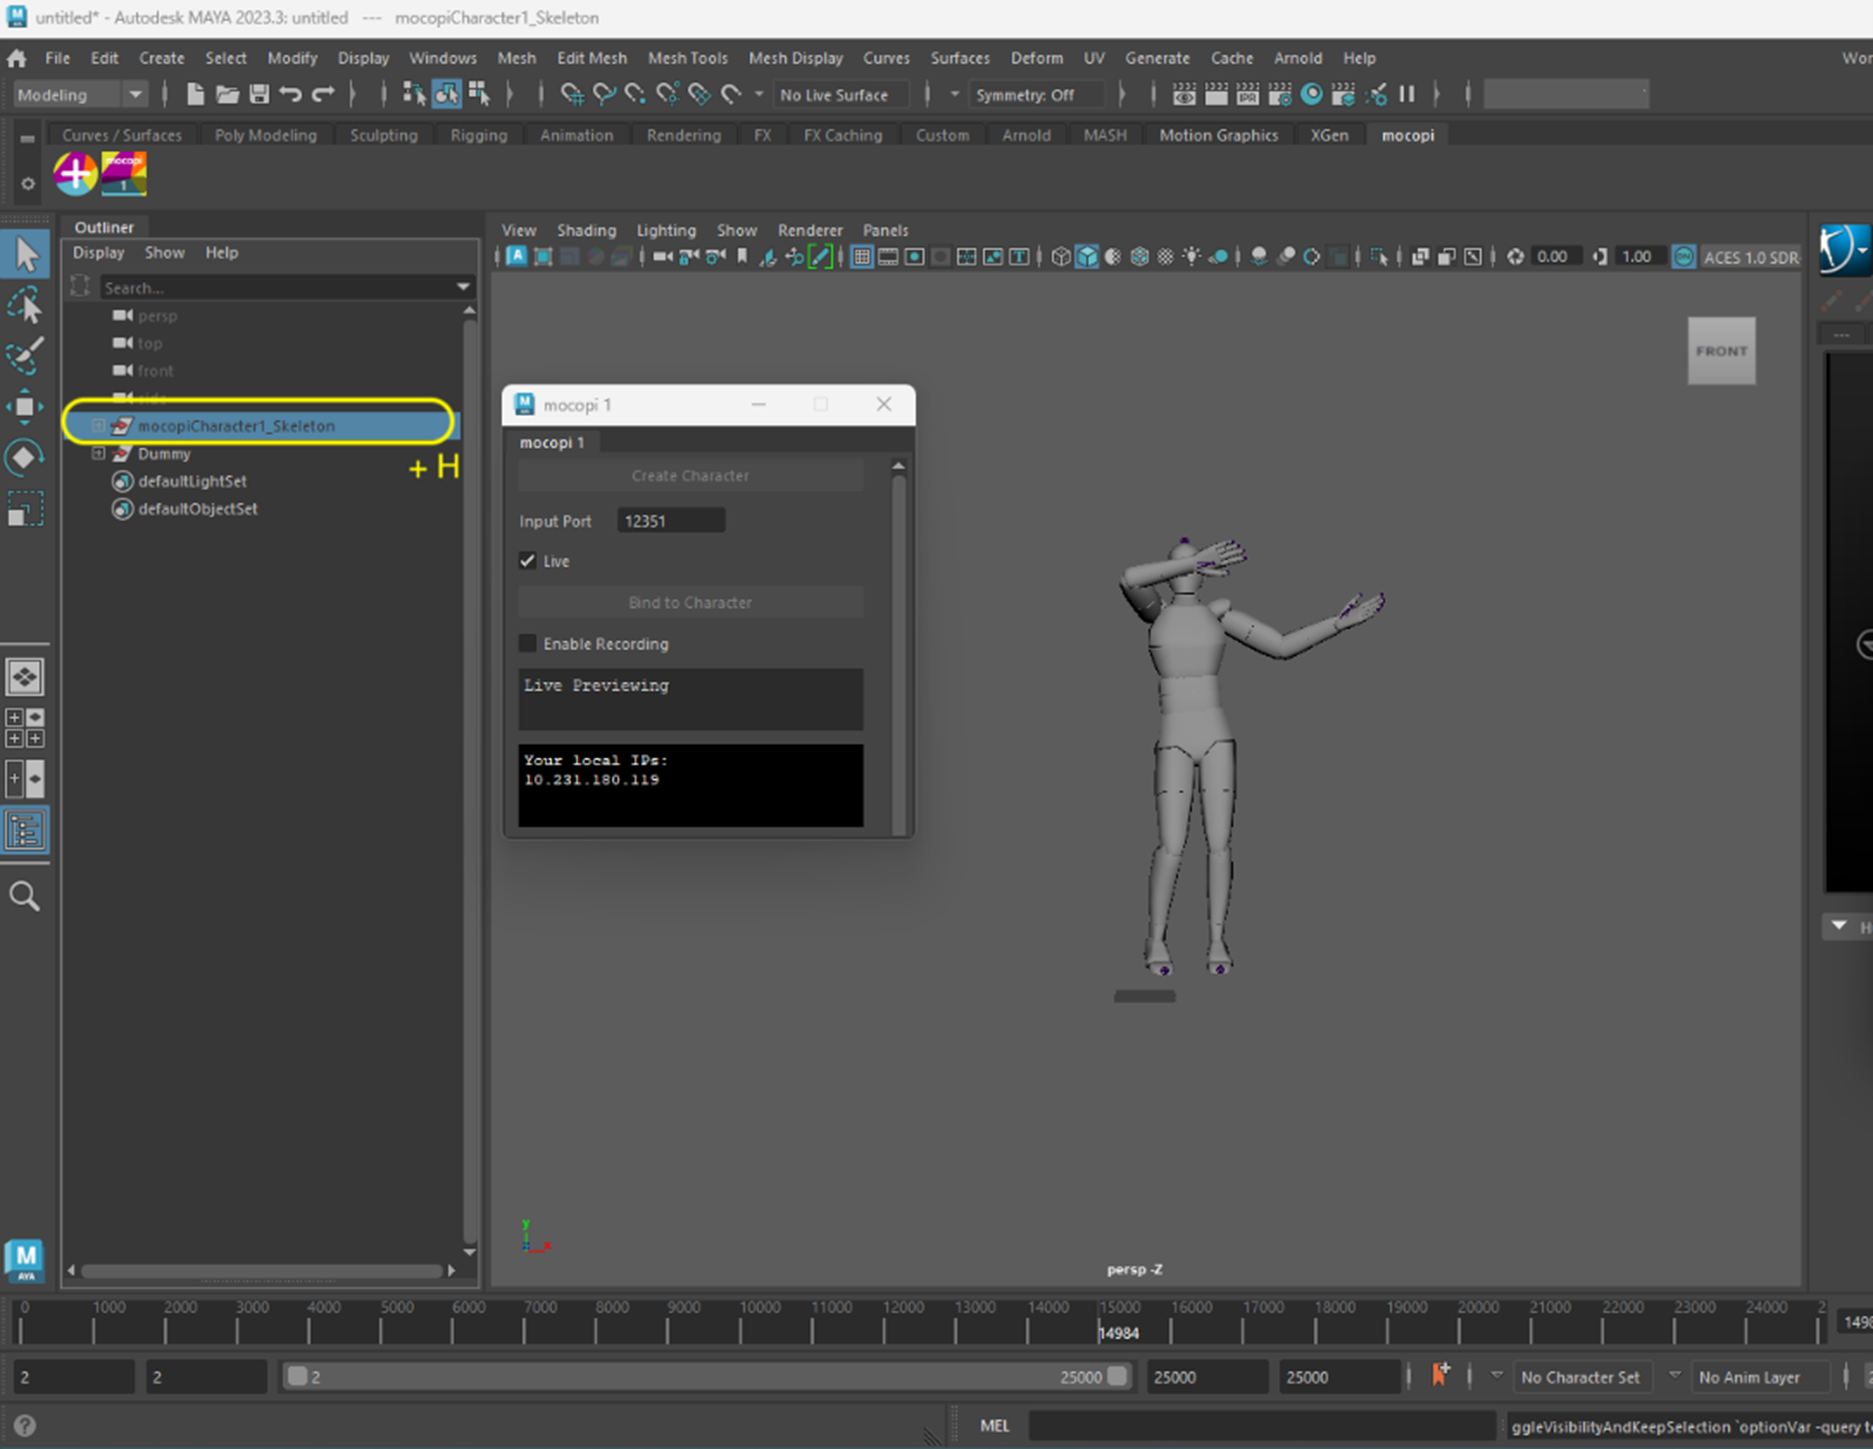
Hide mocopi Character skeleton, select mocopiCharacter1_Skeleton on the Outliner, and then press the H key
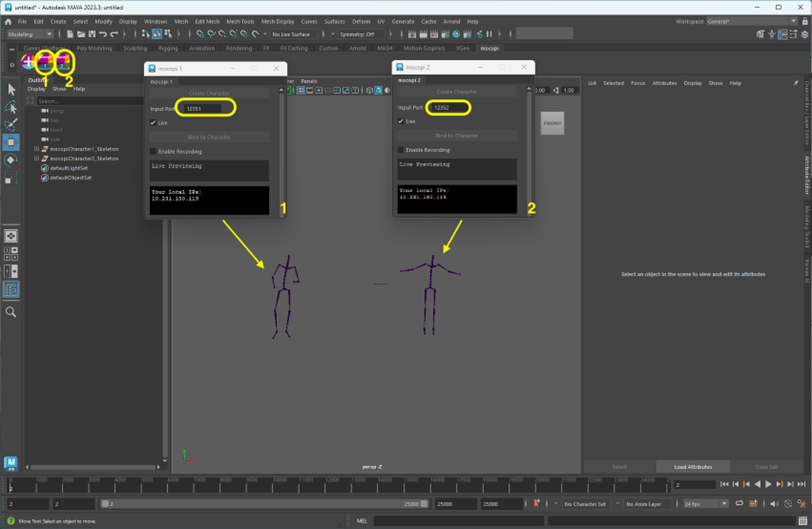
Appendix 1: How to receive multiple data streams
To receive motion from multiple mocopi sensor sets, you will need the following:
- You will need a mocopi sensor set paired and connected to a mobile phone running the mocopi app for each data stream that you intend to receive in Maya. For example for 2 mocopi data streams, you will need two mocopi sensors sets and 2 mobile phones running the mocopi app (the phones can be all Android, all iOS a mix of these).
- In Maya you will need to create a mocopi source for each mocopi sensor that will be sending motion data. For details, please see “STEP 2: Receive and validate motion data” and repeat the steps for each mocopi source that you need to set up.
- Each mocopi source needs to receive motion on a different (valid range) port number, and the port needs to match the port entered on the mocopi app that is connected to the sensor set.
-
It is not necessary to change any plugin files or configuration to enable support for multiple mocopi motion sources (sensor sets), it is supported out of the box.