# Let's make an application that supports vertical installation
:::faq
#SDK update #new features #for developers #vertical installation #UNITY-CHAN!
:::
## Vertical installation apps can now be created.
With the release of SDK ver. 2.3.0, the ELF-SR2, which was previously recommended to be used at a 45-degree diagonal tilt, can now be used in a 90-degree upright position. This article explains how to create an application that supports vertical installation. This can be done easily with little or no changes to existing project files, so please give it a try.
※Vertical installation is available only with ELF-SR2.
## Let's try vertical installation.
As a sample, let's try to use "Unity-chan Live Stage", provided by Unity Technologies Japan, to support vertical installation.
:::note
You can download the project data from the following link.
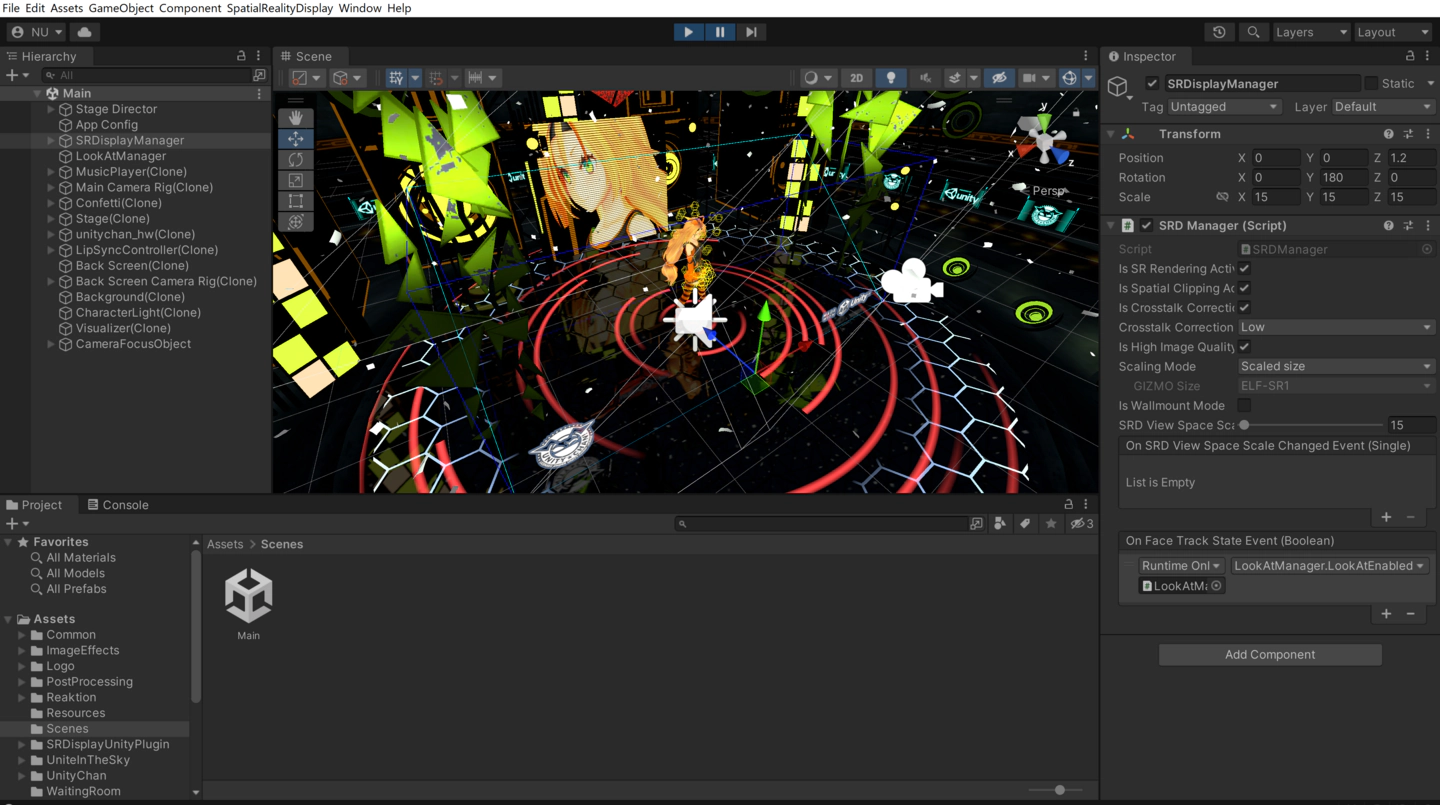
[Unity-chan DL page](https://unity-chan.com/download/releaseNote.php?id=crs-srd) ::: ### Update the SDK and open an existing scene First, update the Spatial Reality Display Settings (hereafter Settings app) to ver 2.3.0 and replace the Unity Plugin in the project data with ver 2.3.0. After the update is complete, open main.scene in the Assets>Scene folder. By default, it should look like the figure below.
### Wallmount Mode Support
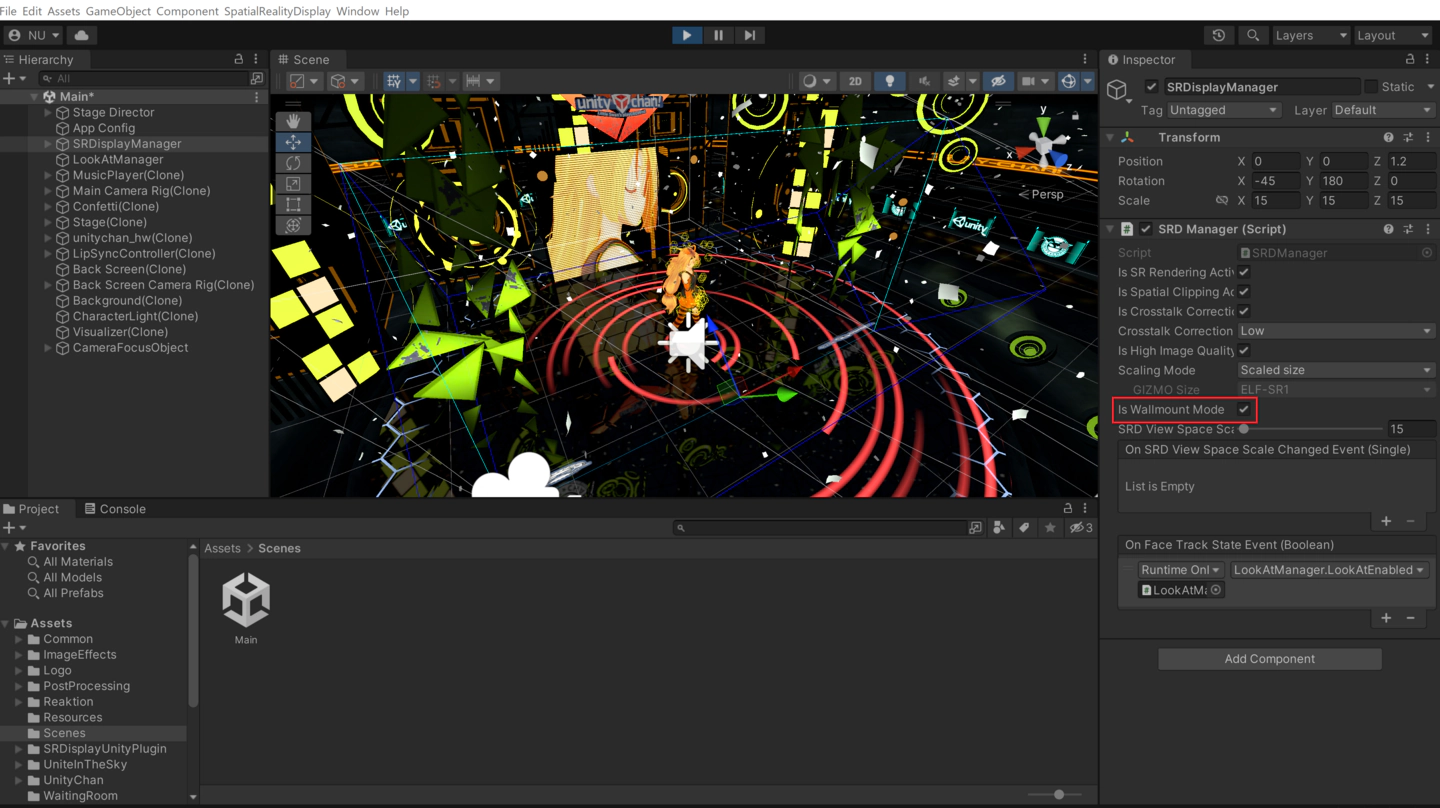
Check the Inspector and check the "is Wallmount Mode" checkbox in the SRD Manager. Then, you will see the SRD Manager tilted 45 degrees towards the front. If you stand the display vertically on a monitor arm or a similar apparatus, you will see that the viewpoint is changed to one as if you are looking at a live stage from the front, unlike the overhead viewpoint you have had until now.
### Let's fill the screen with more characters!
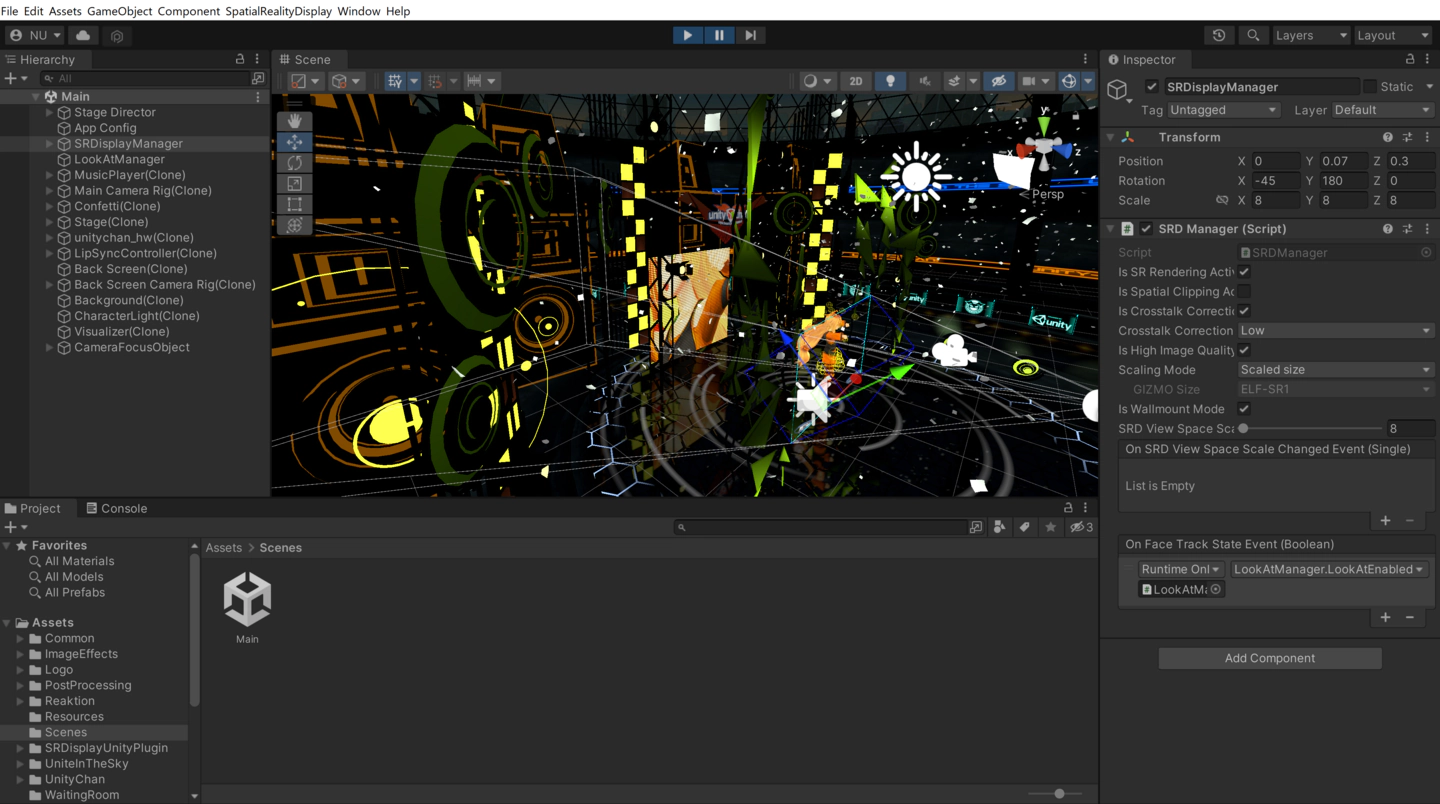
Adjust the SRD Manager's Position and Scale settings. By standing the display upright, it is possible to express the height in a larger direction. By setting the SRD Manager smaller and adjusting the position, you can fill the screen with characters as shown in the figure below. This will increase the sense of realism, and make characters and objects appear larger than in the previous 45-degree installation.
### Video shaking adjustment to reduce background blurring
Depending on the content, vertical installation can greatly improve the quality of the experience. Depending on the experience you want to provide to your users, you may want to develop a conventional 45-degree installation or a vertical installation, based on the type of installation you want to use.
Reference: [Vertical installation is now possible.](/Products/Developer-Spatial-Reality-display/en/tips/vertical-app-introduction/)
© Unity Technologies Japan/UCL
[Unity-chan DL page](https://unity-chan.com/download/releaseNote.php?id=crs-srd) ::: ### Update the SDK and open an existing scene First, update the Spatial Reality Display Settings (hereafter Settings app) to ver 2.3.0 and replace the Unity Plugin in the project data with ver 2.3.0. After the update is complete, open main.scene in the Assets>Scene folder. By default, it should look like the figure below.
{.img100}
How it looks on the Unity Editor
{.img100}
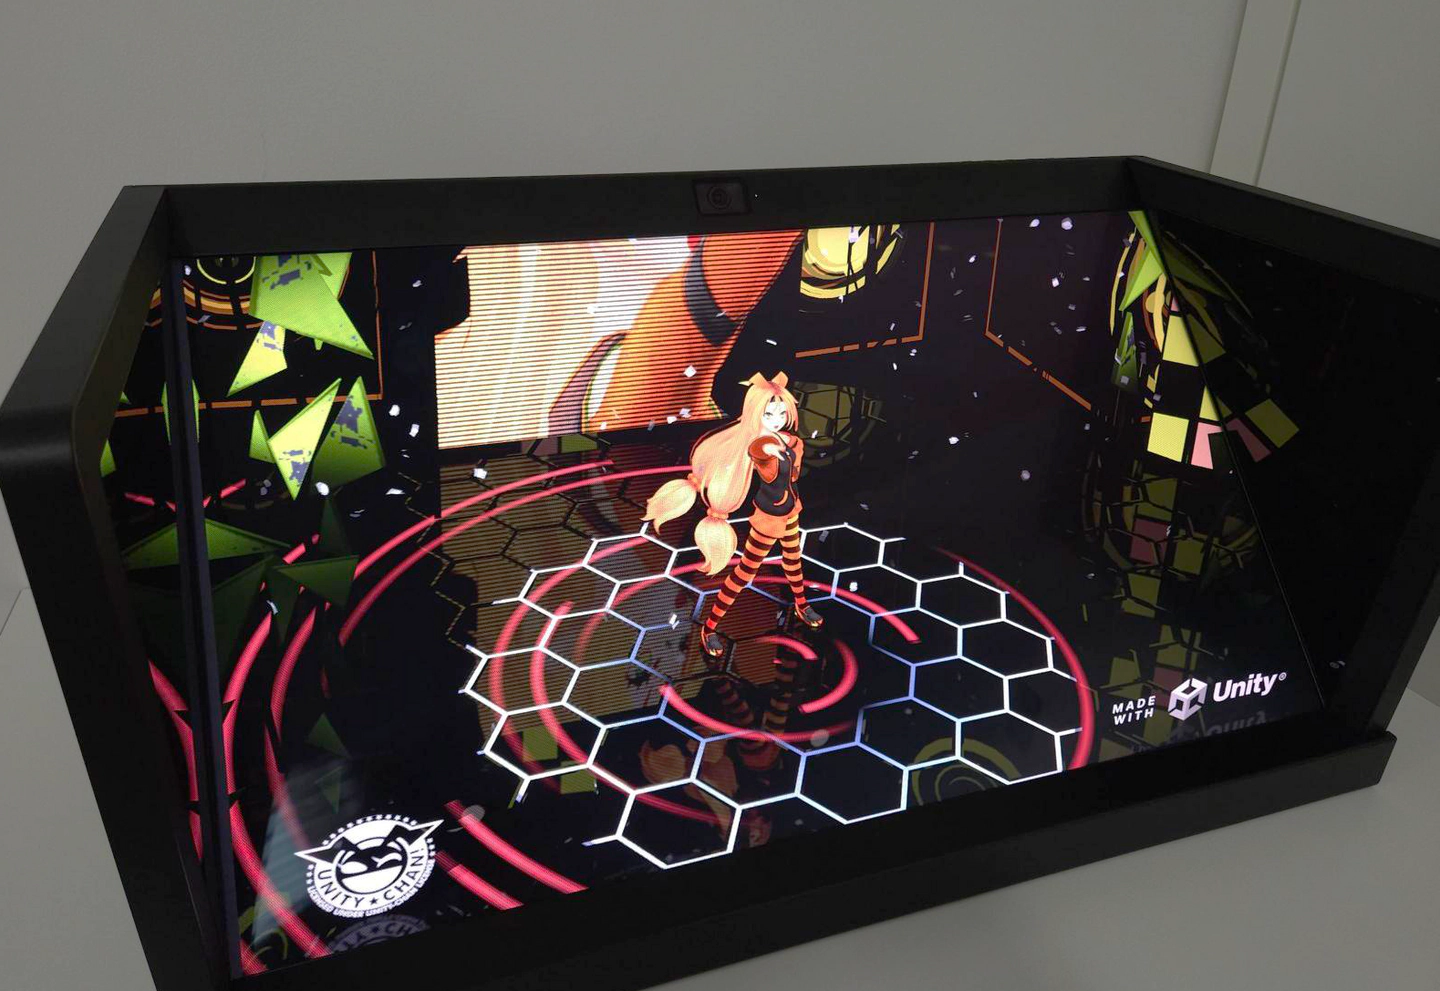
Actual visibility
{.img100}
How Wallmount Mode looks on the Unity Editor
{.img100}
How Wallmount Mode actually looks
{.img100}
Large view of the character
{.img100}
How the character actually looks when projected in large size
A tab for display settings has been added to the Settings app,
allowing users to turn video stabilization on or off by launching the Settings app after launching an application that supports Wallmount Mode.
(*Image stabilization cannot be used if the Settings application is launched before the application is launched.)
When using vertical installation and viewing content with depth, the background may blur significantly when you move your face.
By turning on the video shaking adjustment, this blurring can be reduced.
In addition, by adjusting the Tilt bar in the Settings app>Display Settings, you can tilt the SRD Manager by 1 degree to fine tune the SRD Manager.
Please try this when using vertical installation.
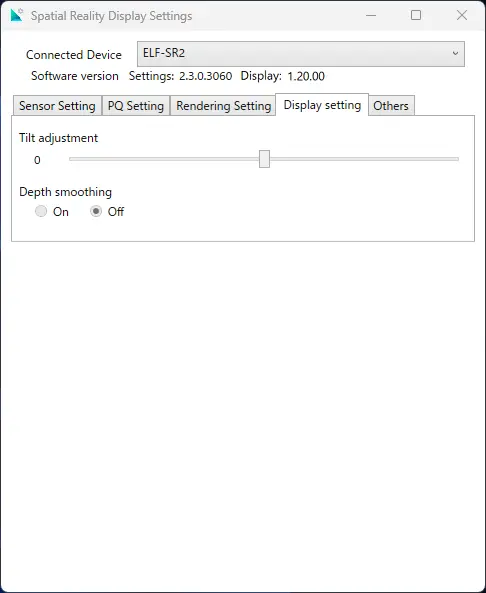{.img100}
Turn on video shake adjustment.
© Unity Technologies Japan/UCL

